Windows 11 optimization is one step ahead out of several improvements and features which makes use of new innovations to deliver superior gaming experience.
You don’t need a third-party app to increase the performance of your operating system, with the altering of a few settings the performance of your Windows can be improved.
By default, Windows 11 settings are suitable for overall pleasurable performance, however users can exploit several factors to optimize and speed up their device.
Defragmentation
This is one of the means to boost the performance of your computer and it helps to regroup data, making it quickly accessible. Defragmentation will enhance your device performance when you’re making use of a hard drive and not a solid state drive.
While working with files on a hard drive, pieces are gathered in distinct sectors, and to use the files, the hard drive has to spin to that particular sector, in such a way that the head of the drive can detect it.
But, when you delete or move these files, the sectors on the drive turn empty, generating a space between data. Thereby making the hard drive do extra work in hovering over the empty space to obtain a certain data hence developing performance problems.
So, defragmentation is to reorder the data and position them in sectors nearer to each other, such that the drive can speedily access them.
- And to defrag your Windows 11 device;
- Go to the Search bar on Taskbar and enter defrag.
- Click on the best match result, Defragment and Optimize Drives.
- On the screen that will come up, the drives and their current defragmentation status will be displayed. So, highlight the drive to analyze and then tap Analyze. Note that this process is only applicable to hard drives and does not support SSD.
- And you can close the window after the process is complete.
And you can decide to schedule Defragment daily, weekly, or monthly via the Change settings link.
Disable Startup Apps
To do this, go to the Settings app > Apps and click on the option Startup.
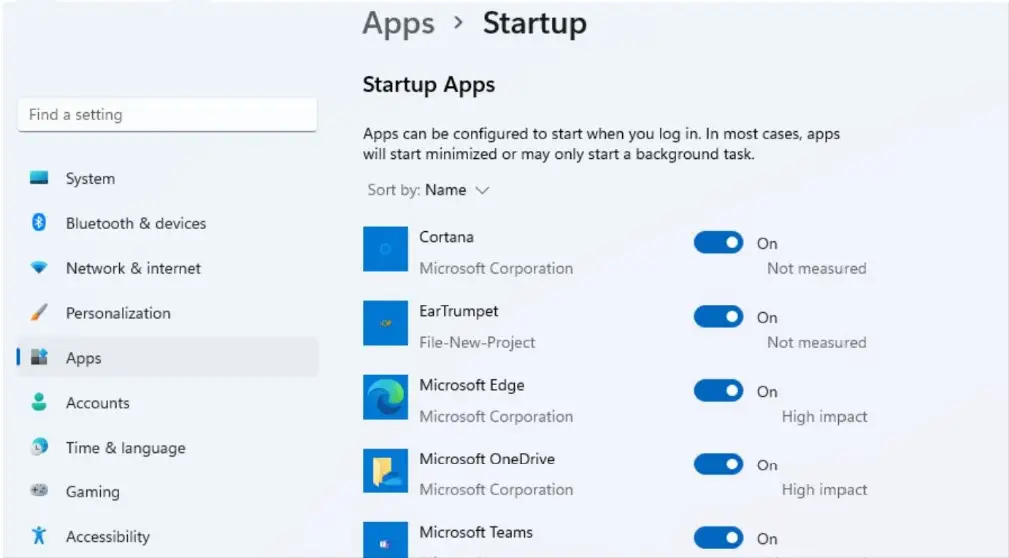
- Now disable every app that you don’t want to start with your device.
And this will prevent Windows from automatically restarting the disabled apps when you restart your device.
Turn Off background apps: to do this, go to the Settings app > Apps > Apps & Features.
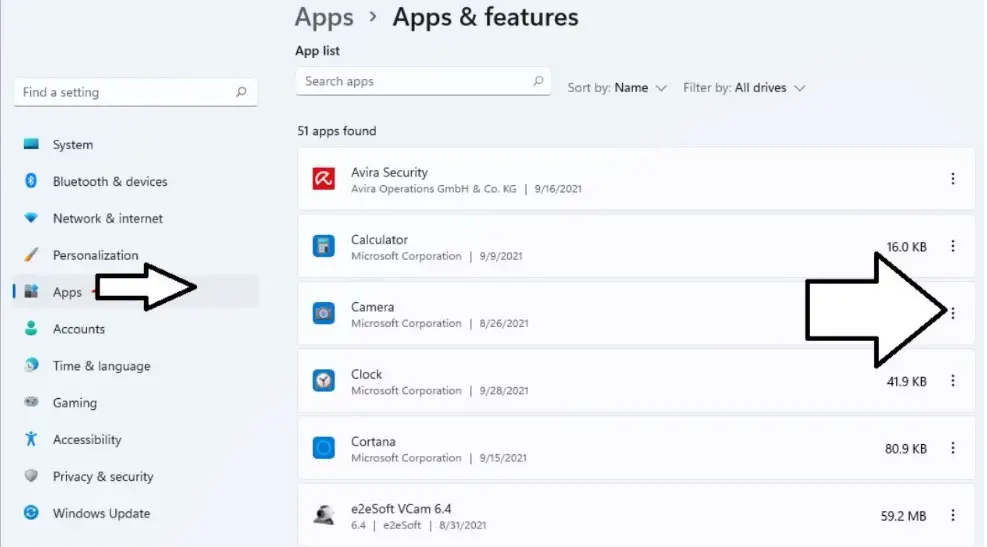
- Click on the vertical Ellipses next to the app that you want to stop from running in the background of your device.
- Then select the option Advanced options.
- And set the Background app permission to the option Never. And you can do the same thing for every apps you want to disable.
Uninstall Apps
Apps like Skype and OneDrive constantly runs on the background of your computer even after you have disabled them in the Startup menu. So you can uninstall them and to do this; go to the Settings app > Apps > Apps & Features.
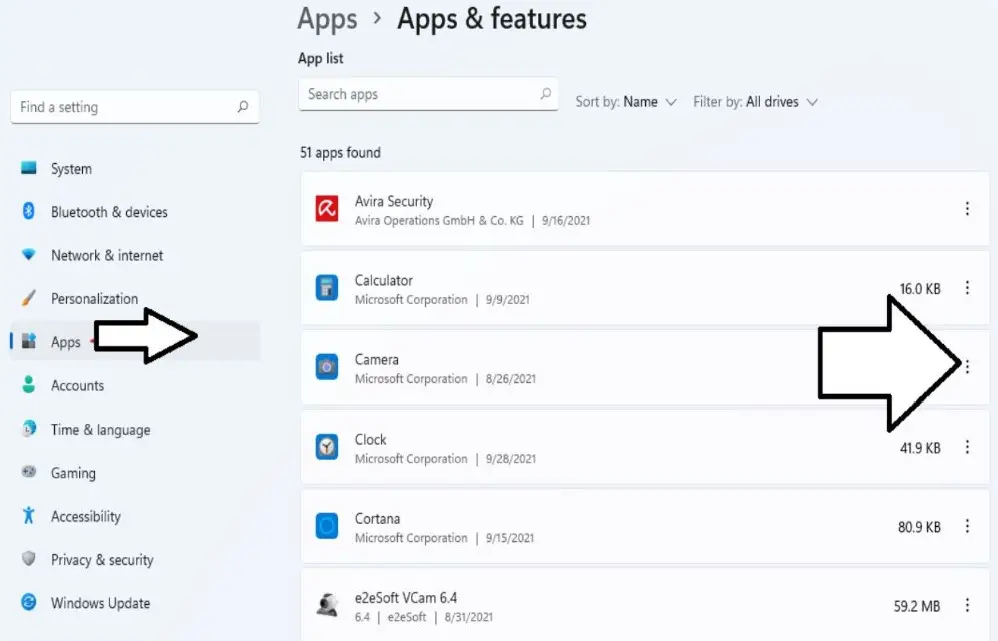
- Click on the vertical Ellipses next to the app that you want to stop from running in the background of your device.
- Then select the option Uninstall.
If you want to use OneDrive, you can manually access it from its website. Apart from the mentioned apps above, browse through the Apps & Features window and look for apps or programs that you don’t need that might be running in the background. And once you identify the apps, go ahead to uninstall them.
Switch performance settings
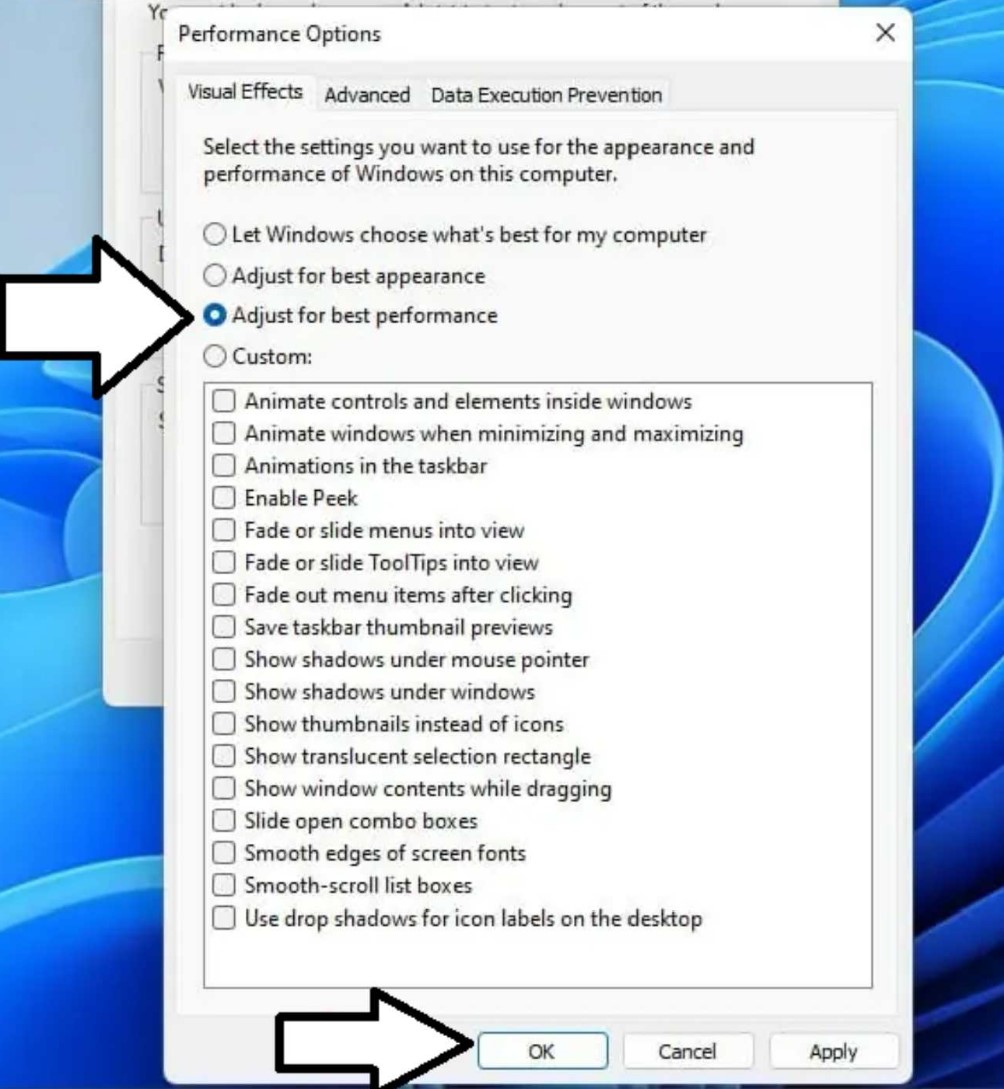
To do this, go to the search bar and type advanced. And then select the best match View advanced system settings.
- Click on the link, Settings under the heading Performance.
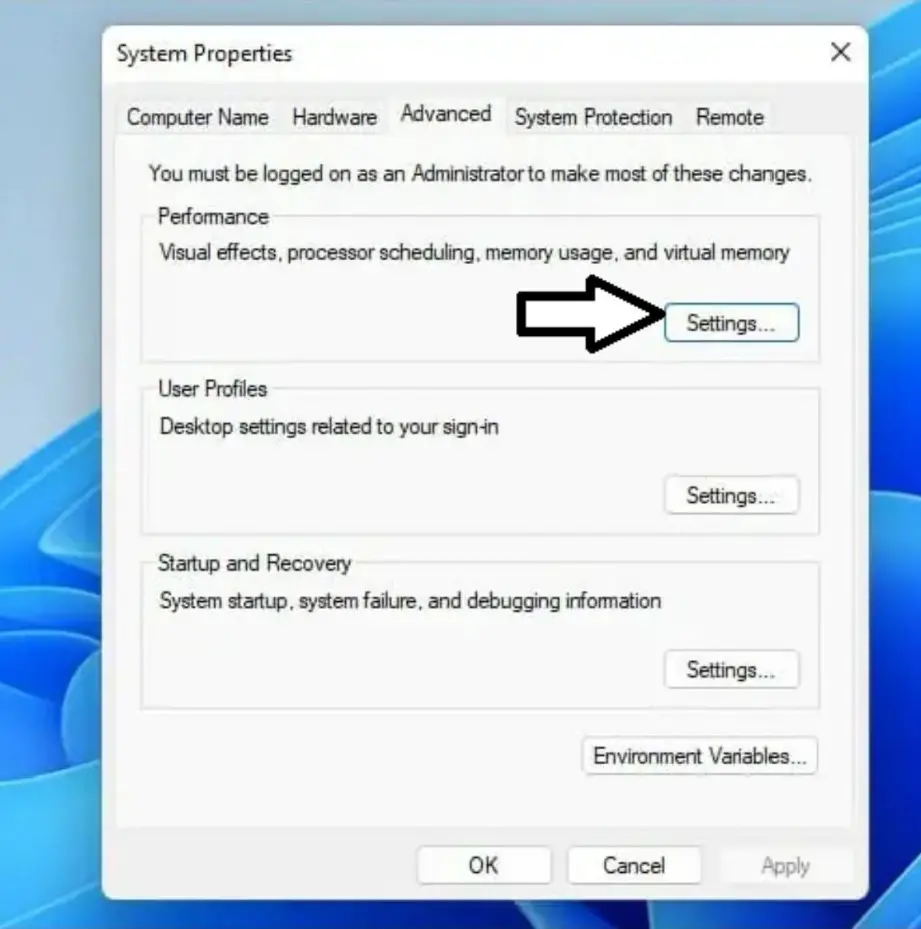
Then tick the circle box next to the option Adjust for best performance, and hit OK at the bottom of the display.
Turn On Storage Sense and Erase the temporary files
To achieve this, open up the Settings app.
- Click on the option Storage under the System settings interface.
- And toggle On the switch next to the right of the option Storage Sense under the heading Storage Management.
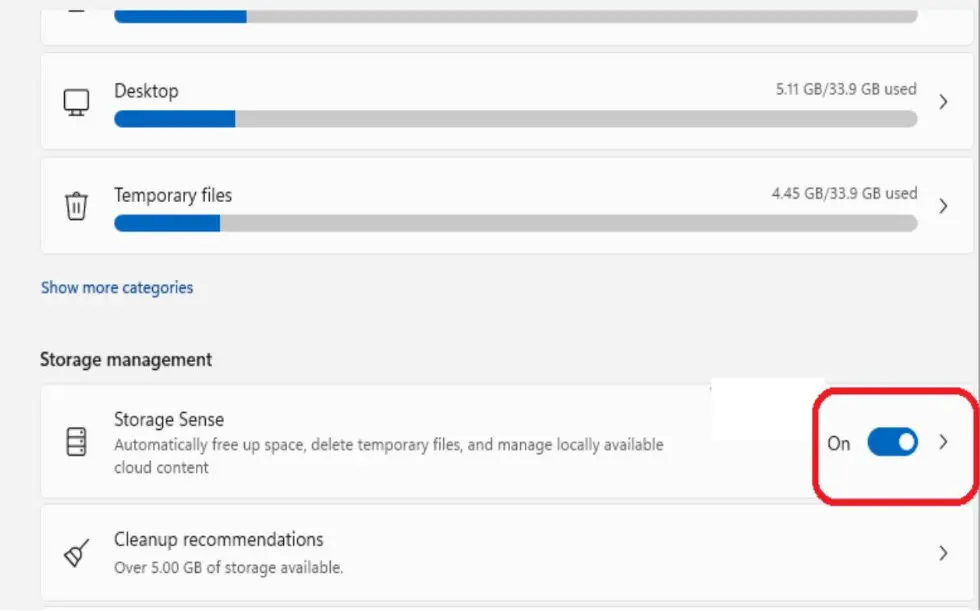
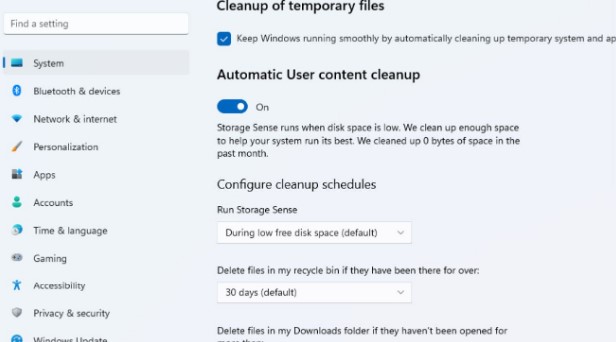
- And click on Storage Sense to get more settings to customize and via the Storage Sense window you can schedule when you want storage sense to run.
Navigate back to the Storage windows and go into Temporary files.
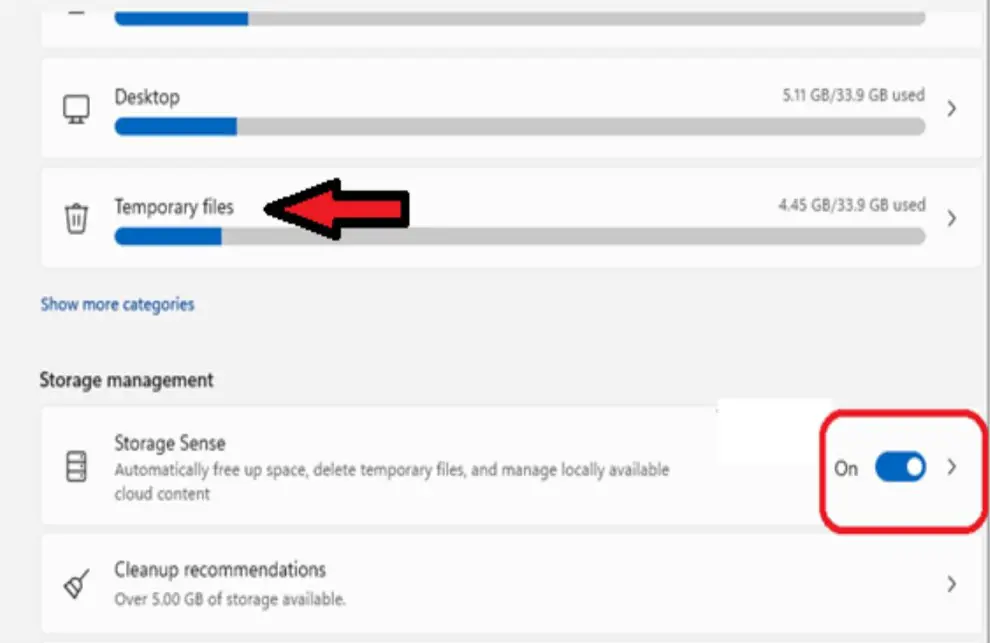
- Choose the files you desire to erase, and tap Remove files to confirm.
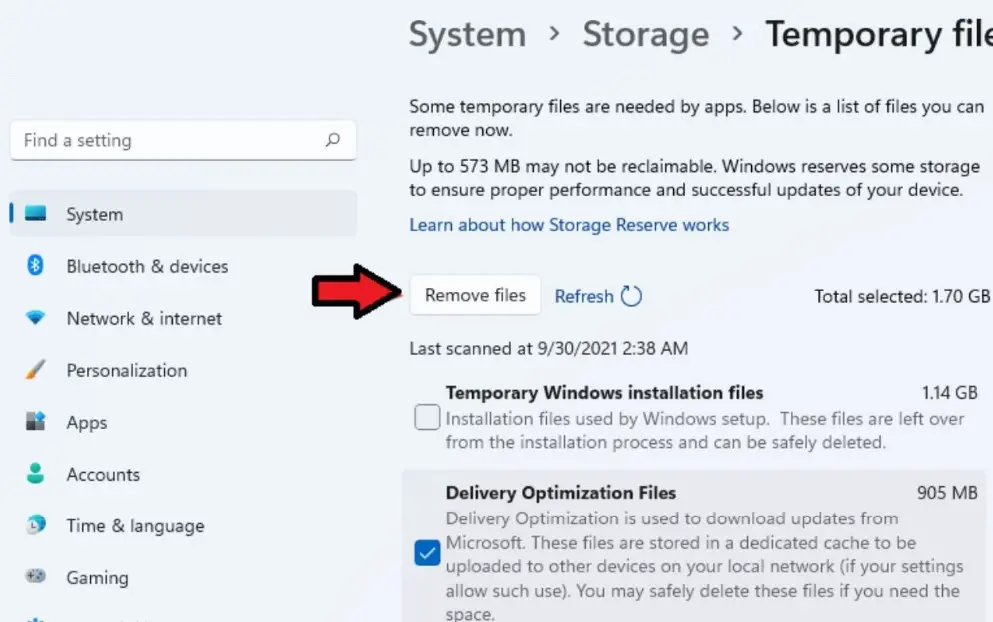
- Click Continue on small the display that will pop up and you will be prompted about the nature of the action you are about to take. As the selected files will be deleted permanently.
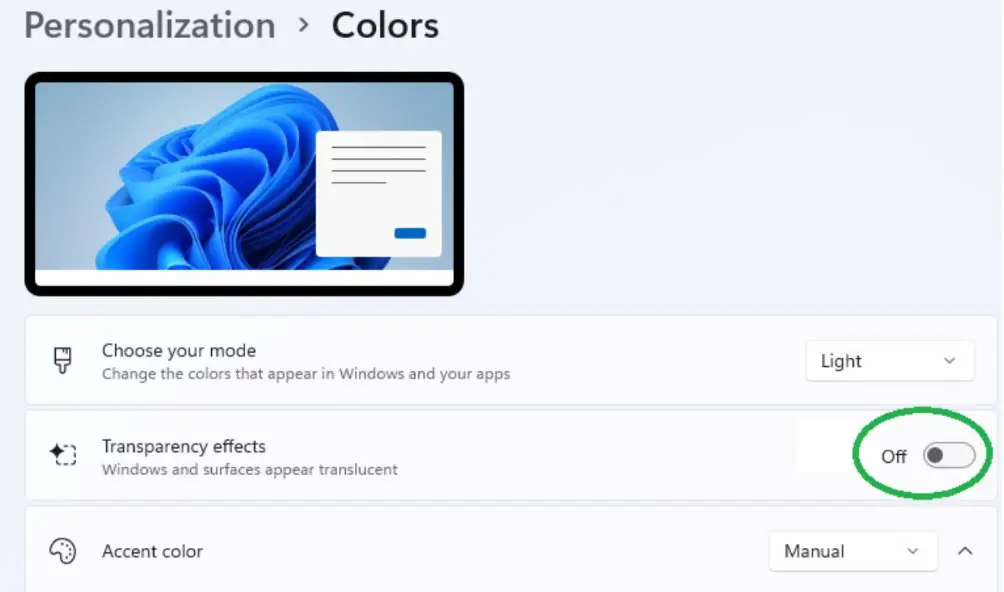
Turn Off Transparency Effects
To do this, open up the Settings app.
- Click on the setting Personalization and toggle on the option Colors.
- Then set the switch next to the option Transparency effects to Off.
Switch Power Settings
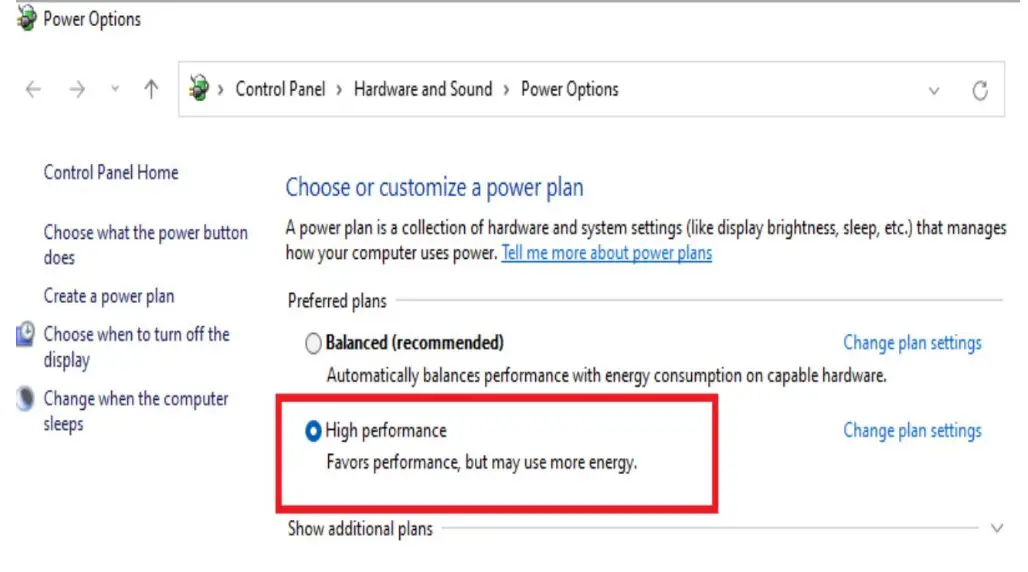
To do this, go to the search bar and type power plan.
- Then select the best match. Choose a power plan.
- And set the preferred power plan to High Performance.
How to Turn Off Notifications
One of the annoying things in Windows 11 is that the number of notifications has actually increased when compared to that of Windows 10.
We have a number of notifications you could turn off and to do this, go to Settings and select Notifications under System settings.
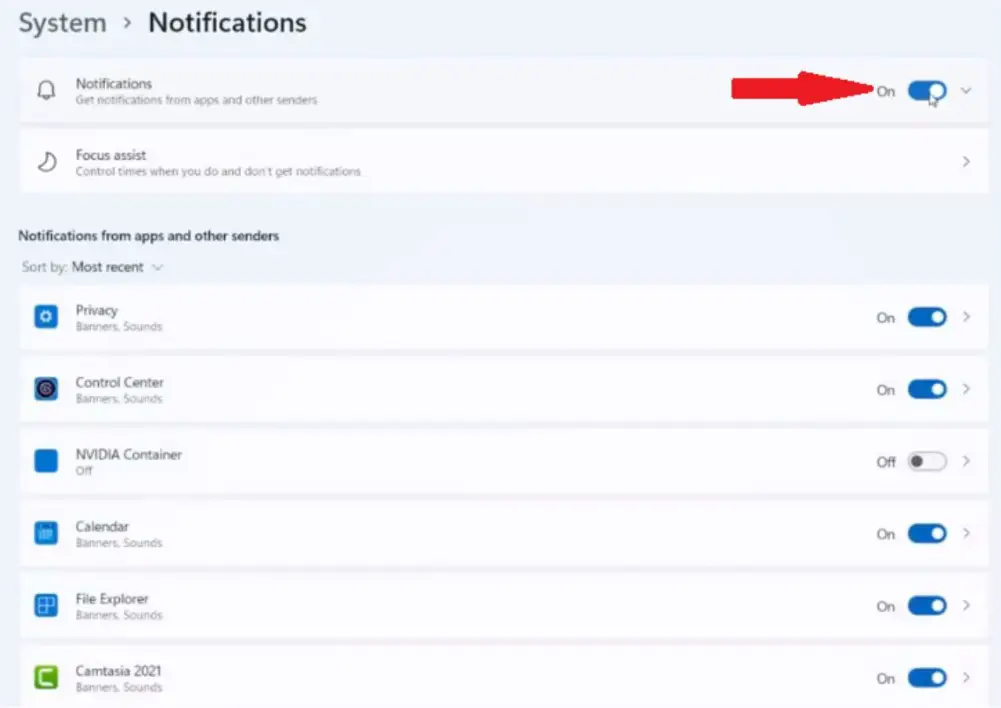
By default, the Notifications switch at the top of the display is turned on and you can turn it Off to disable all notifications. And under the section Notifications from apps and other senders, you disable notifications from apps individually.
Also, at the bottom of the window uncheck the option Get tips and suggestions when I use Windows.
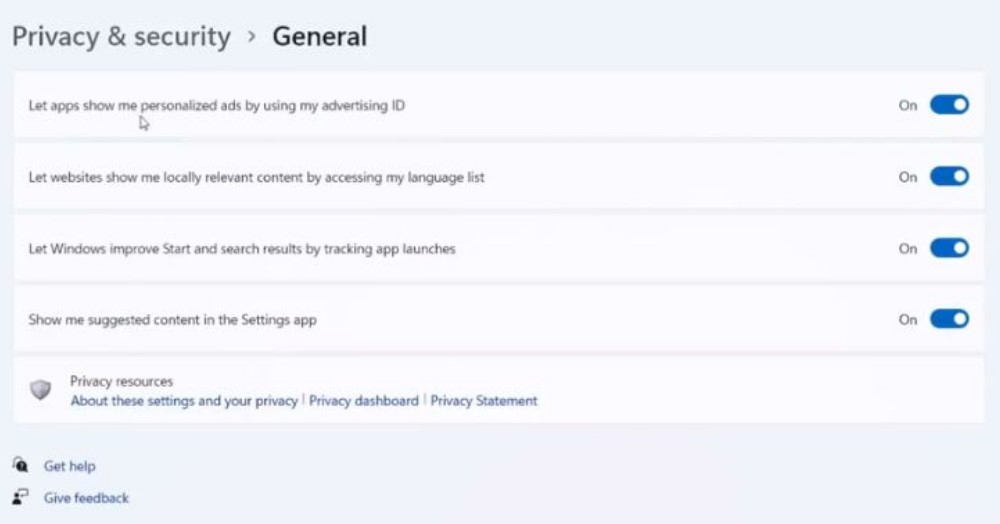
Furthermore, return to the main Settings app window and go to Privacy & Security. Under the section Windows permissions, select the option General. You will notice there are several settings on the screen linked to your advertising ID and it is recommended to turn Off all the settings to avoid customers advertisement notifications.
You can also receive notifications from File Manager, open the File Manager from the Taskbar.
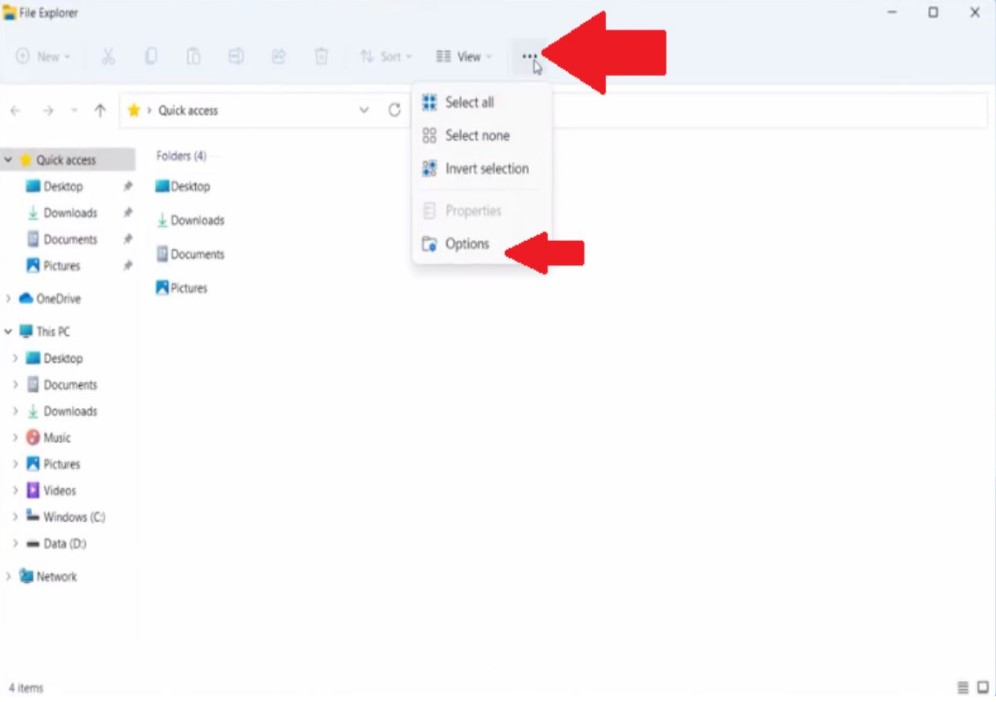
- Click on the Ellipses on the top of the display above and select Options.
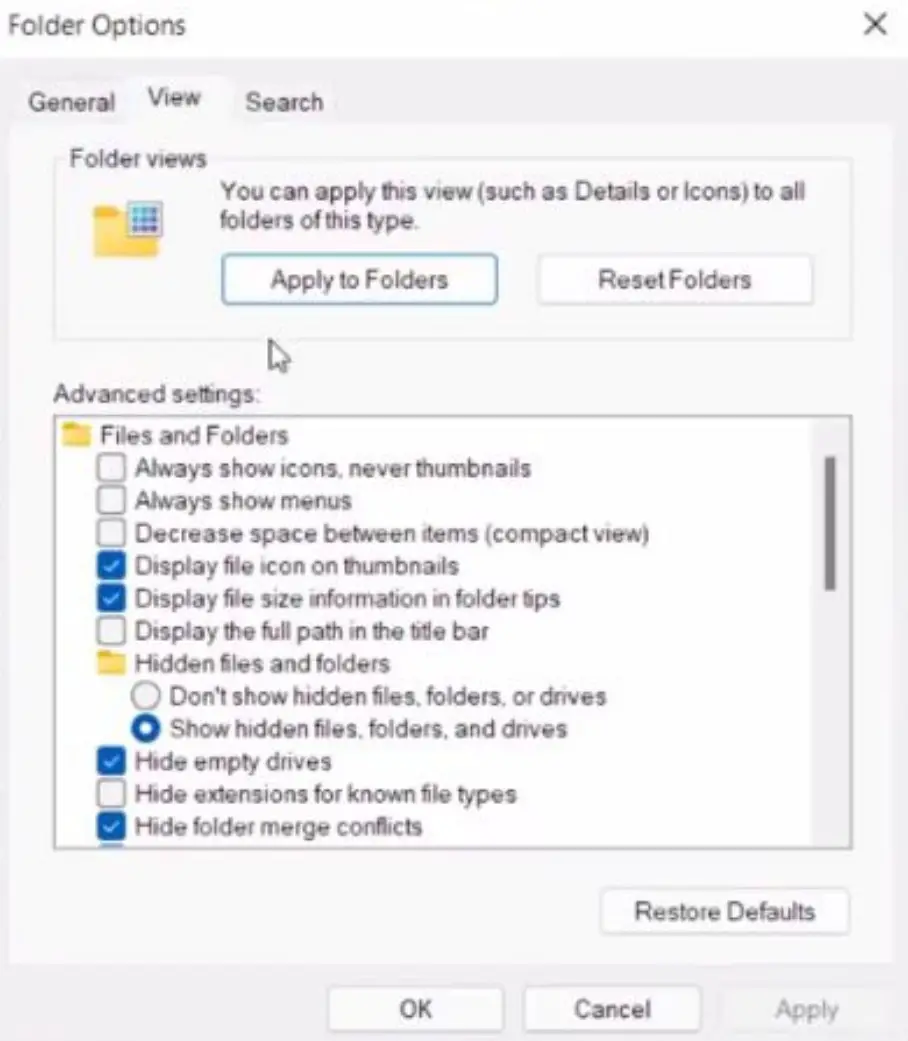
- Highlight the View tab and scroll down.
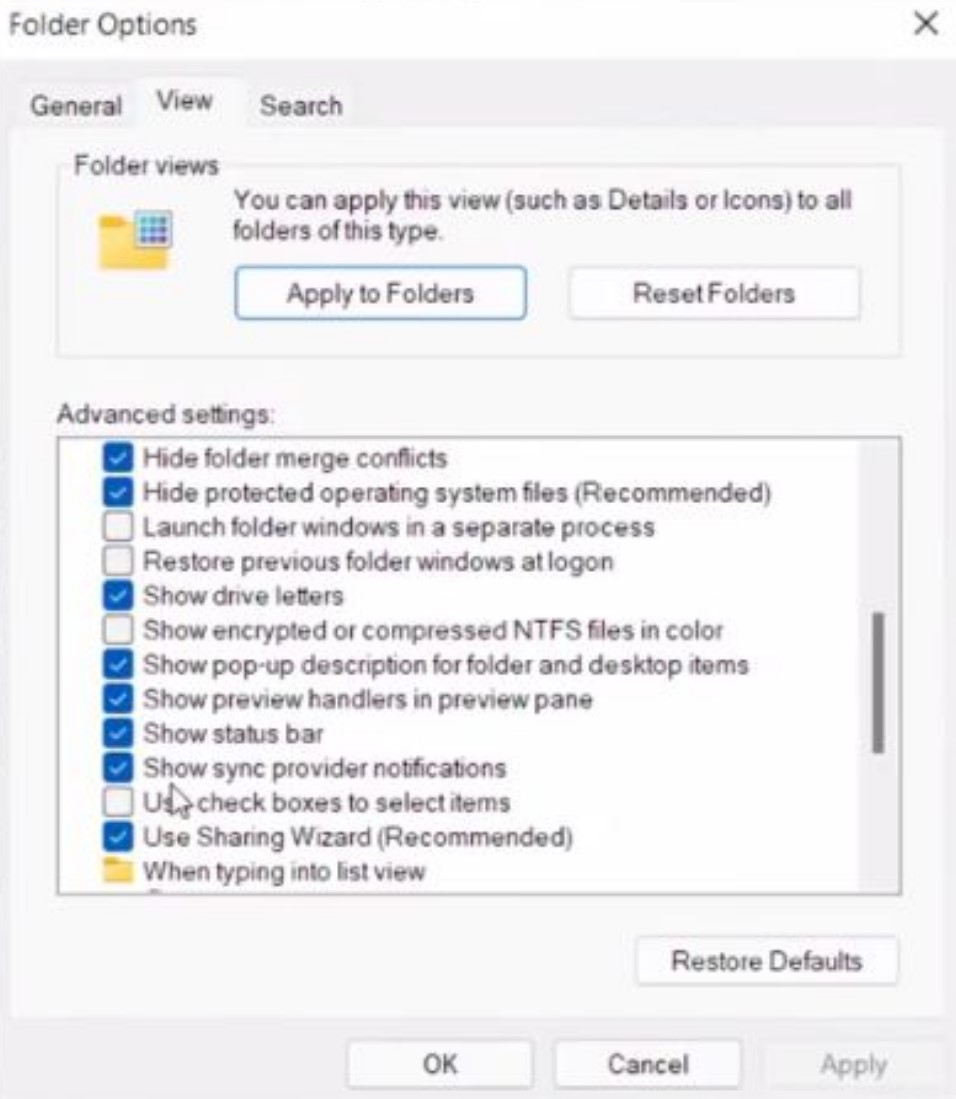
Uncheck the option Show sync provider notifications and hit Ok to stop synced providers notifications.
Optimizing your Windows 11 performance is an essential to ensure a smooth and efficient computing experience. By following the tips and techniques outlined in this post, you can enhance your system’s speed, responsiveness, and overall functionality. Whether it’s tweaking system settings, managing startup applications, or keeping your software up to date, taking these steps will help you make the most of your Windows 11 PC. Remember, a well-optimized operating system can significantly boost productivity and enjoyment in your digital endeavors.


Comments