To print a document in Windows, the typical process involves opening the file and accessing the Print menu. However, you can easy this task by incorporating your printer as an option in the right-click context menu.
SEE ALSO: Use Your Voice to log into Windows 11
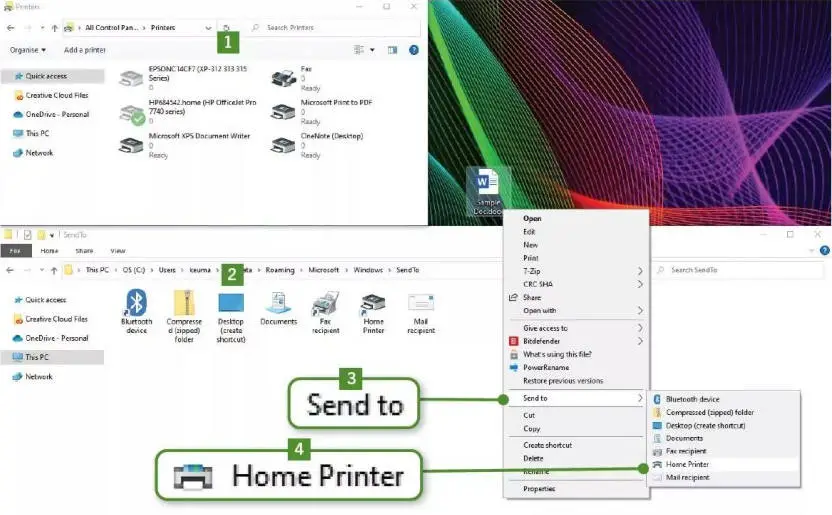
Initiate the process by opening two File Explorer windows. In one window, enter shell:PrintersFolder into the address bar; in the other window, type shell:sendto. This action will reveal the Printers (1 in our screenshot) and SendTo folders 2.

Subsequently, perform a drag-and-drop action by moving your printer icon from the Printers folder into SendTo. This action makes it visible when you right-click the file intended for printing, followed by selecting ‘Send to‘ 3. Additionally, you have the option to rename it; for instance, we chose ‘Home Printer‘ 4. Clicking on it will promptly dispatch your document to the print queue.
You can find more Windows 11 tips and tricks here.


Comments