Microsoft’s integrated speech recognition system allows you to engage with a wide range of applications on your device. This functionality proves valuable whether you’re on Facebook, composing emails, responding to messages, or generating content for your website or blog. The first step is to ensure that your connected microphone, or the one you intend to use, is enabled for voice detection.
Here’s how to set up your microphone for voice recognition:
- Navigate to “Settings” and select “System“. Alternatively, you can quickly access this by typing “sound” into the search field at the top of the Start menu.
- Choose the best match, which is “Sound settings“. Your device will make use of the microphone from any external device connected to it. In the “Sound settings” window, you’ll find a list of output devices, including speakers, headsets, headphones, and more, which are responsible for playing sounds.
- Scroll down to the “Input” section, and the devices listed here are meant for speaking or recording your voice. Select the microphone or device you wish to use. You’ll notice the Volume bar in this section responding as you speak.
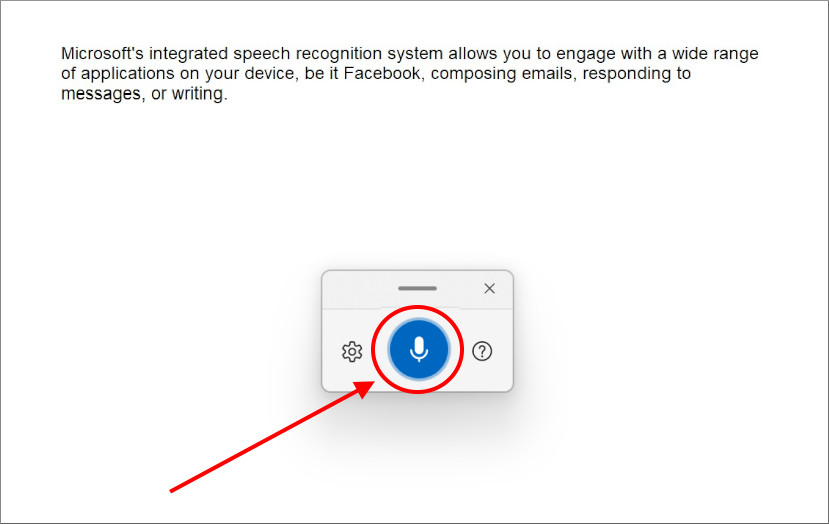
With your microphone set up, proceed to use this feature:
- Launch an application such as Notepad or WordPad.
- Press the Windows key + H to activate the voice typing feature. As you speak, your device will transcribe your words as text into the active window, be it Notepad, WordPad, or any other application.
- To disable this functionality, simply press the ESC key.
It’s important to note that this feature is not limited to just Notepad and WordPad. You can use it in various applications, including Google Docs, the YouTube comment section, Microsoft Word, Outlook, and many others.

Comments