In art, the background is as important as the main subject. Creating unique and colorful backgrounds in an art is like a fun and results come out are fantastic. One of the backgrounds which pops the art of the canvas is the radial background. Let see how you can create one in only a few steps.
Open the image for which you want to create a background. Using the method you like the most, extract the main subject and place it in a separate layer. Now you have two layers: the main subject and the Background layer. Select the Background layer in the Layers panel, and switch to the Gradient tool (G). In the Options Bar, select the Linear Gradient Option, then click on the gradient preview thumbnail to select any colors from the gradient presets.
Now click at the top of the document and drag the gradient straight down to the center of the document. The Gradient tool will create a new Gradient Fill layer (between the background and main subject layers) with the colors you selected.
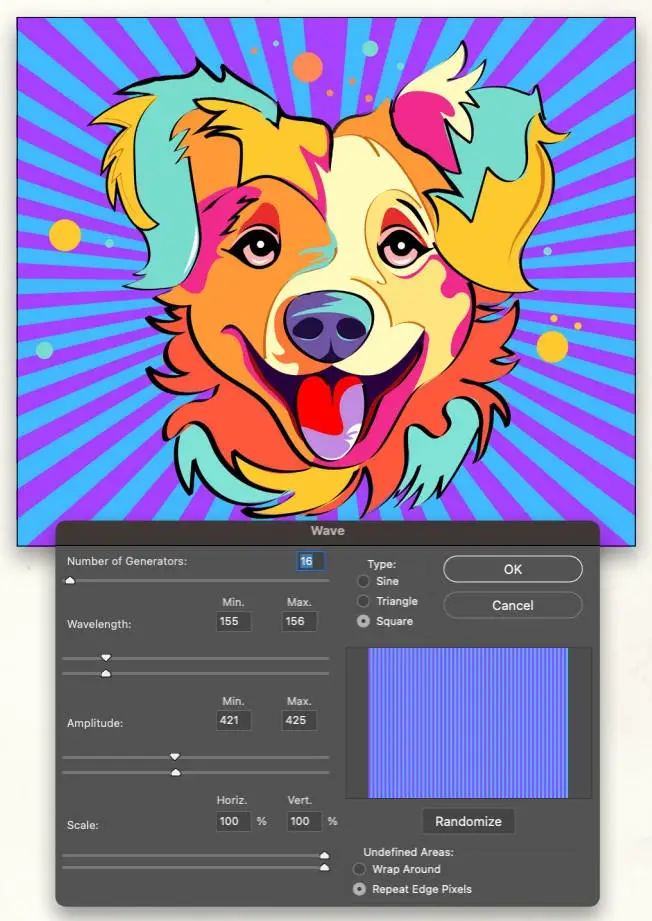
Go to Filter>Distort>Wave, and click Convert to Smart Object in the dialog that appears telling you that you need to convert the layer. Use the settings shown here in the Wave dialog and click OK. Then go to Filter>Distort>Polar Coordinates. Specify Rectangular to Polar and click OK. Now you have a beautiful, artistic background.
Share your artistic wonders in the comments below.

Comments