No matter how carefully you curate your music collection, duplicates are inevitable due to artists releasing songs first as singles, then on albums, and eventually on greatest hits collections or movie soundtracks. If you’re tired of managing multiple versions of the same song, follow our guide to identify, manage, and preserve the versions you want to keep in your Music app for Mac, iPhone, and iPad.
If you find yourself tired out of managing 17 different versions of the same Ed Sheeran song across your Mac, iPhone, and iPad, we understand your frustration, and we’re here to offer assistance!
In this tutorial, we’ll guide you through the process of identifying duplicate tracks in the Music app for Mac, demonstrating how to efficiently remove them or designate them as unnecessary. Additionally, we’ll show you how to safeguard the versions you genuinely wish to retain, ensuring you no longer have to endure consecutive plays of “Shape Of You (Single),” “Shape of You (Live),” and “Shape Of You (Remix).”
SEE ALSO: Download Apple maps to Explore Offline
How to Manage Duplicates in Your Music Library:
1. Sort Alphabetically
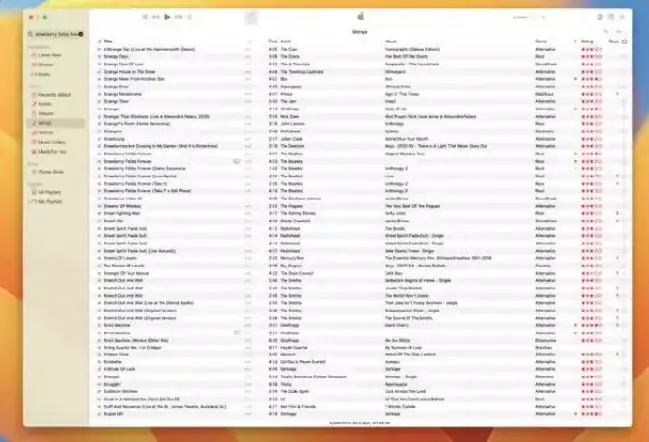
Navigate to the Songs section in the sidebar and click on Titles at the top to sort your library alphabetically. This helps identify tracks with similar names.
2. Show Duplicate Item
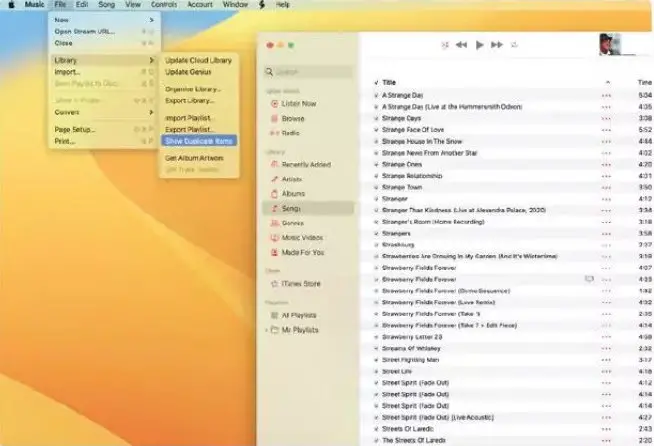
Go to File > Library > Show Duplicate Items. The main window will display an updated list of songs identified as identical by the Music app using file metadata.
3. Examine Duplicate
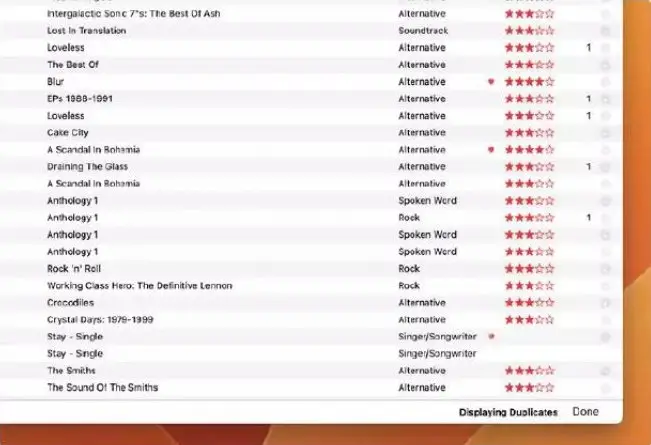
The ‘Displaying Duplicates’ label at the bottom right confirms you’re viewing true duplicates. To exit this view, click Done.
4. Sound Chec
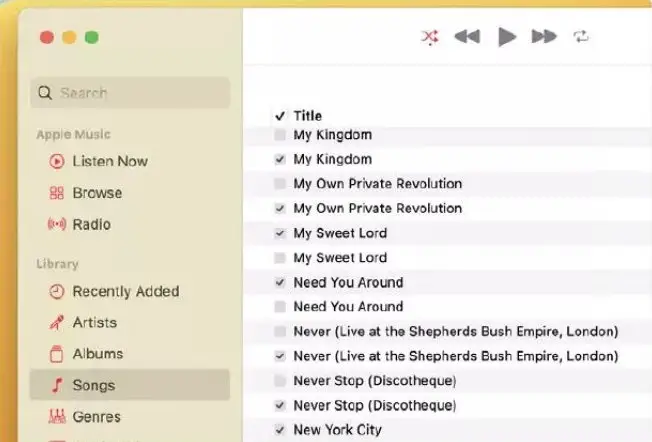
Before deleting tracks, use checkboxes next to each song to uncheck duplicates. Unchecking a song prevents it from playing but retains it in your library.
5. Decision Time
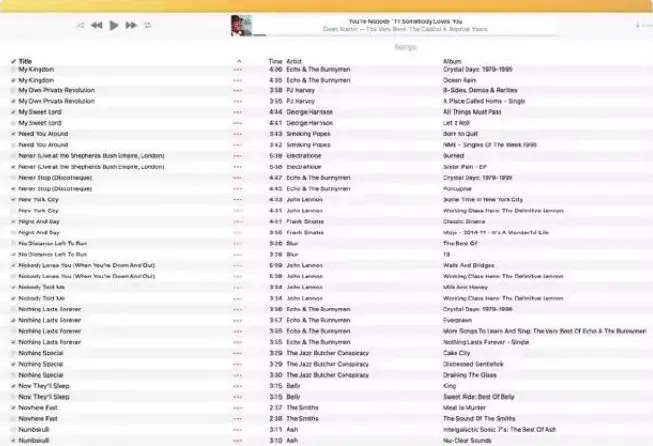
Uncheck duplicate tracks from compilation albums, greatest hits collections, singles, and EPs while preserving album tracks. Your approach may vary.
6. Keep or Delete
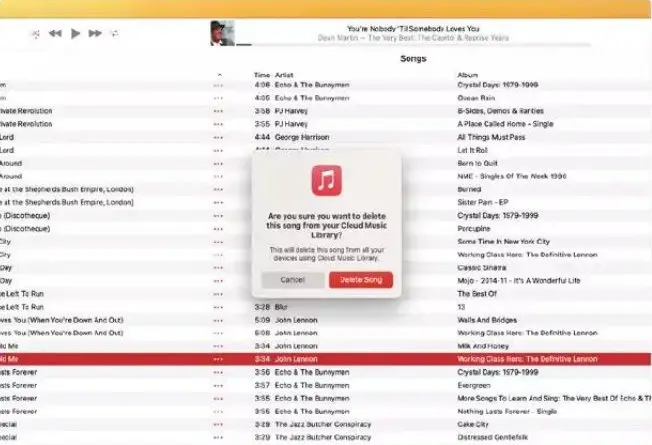
Unchecking stops a duplicate from playing, but the file persists. Press Delete to remove it permanently after confirming in the warning dialog.
7. Manage Similar Files
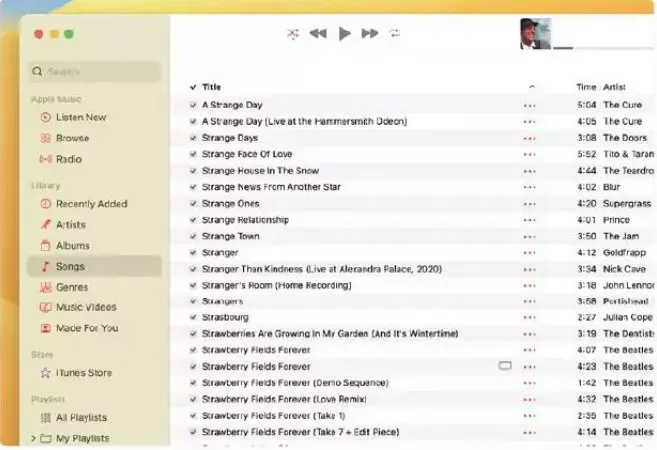
Even after handling exact duplicates, you likely have similar music files. Decide on a strategy for these files, considering your preferences.
8. All You Need is Love
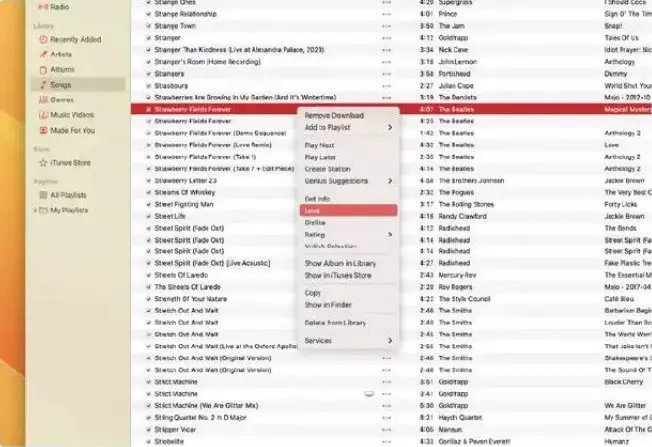
For different versions you want to keep, consider marking them as ‘loved’ to distinguish them in your library.
9. Love is All You Need
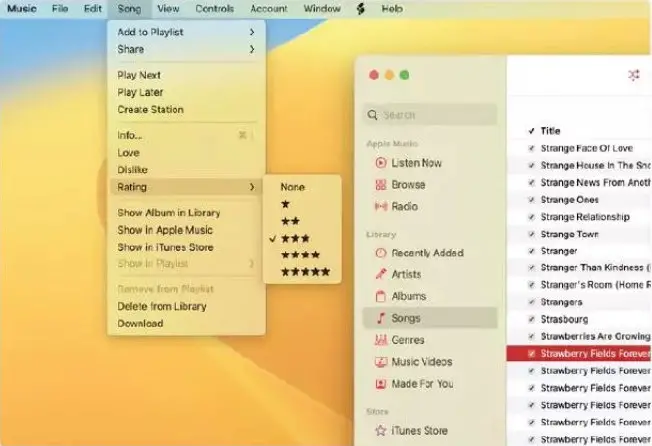
‘Love’ a track by right-clicking and selecting Love from the drop-down or using the Song menu. Alternatively, assign a star rating.
10. It’s in the Stars
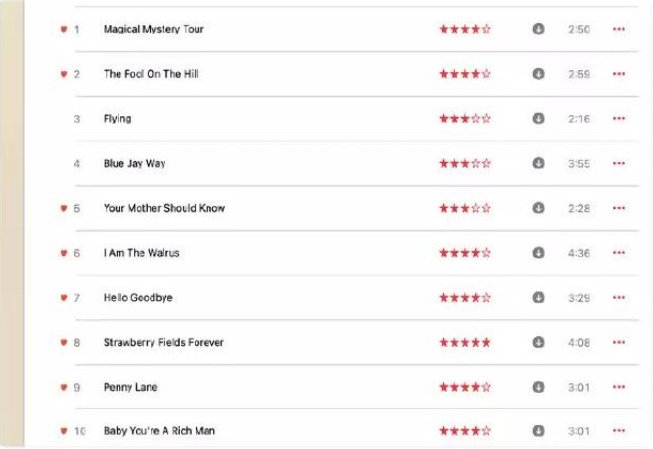
While ‘Love’ is preferred, star ratings offer more granularity. Use them to highlight your favorite versions.
11. Love Smart Playlists
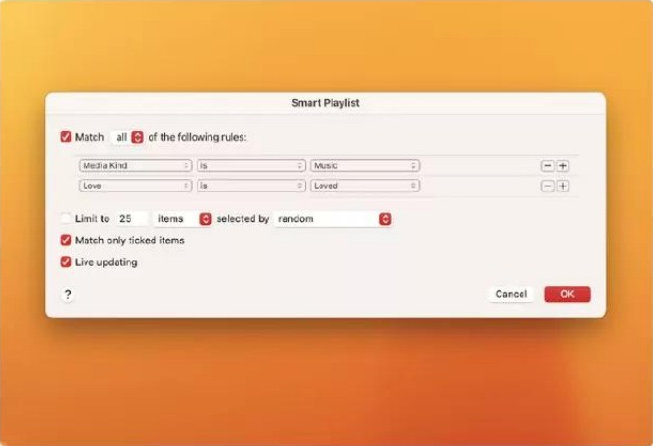
Create smart playlists based on your favorites. In this example, only ‘loved’ songs are included, excluding unchecked items.
12. Silly Love Songs
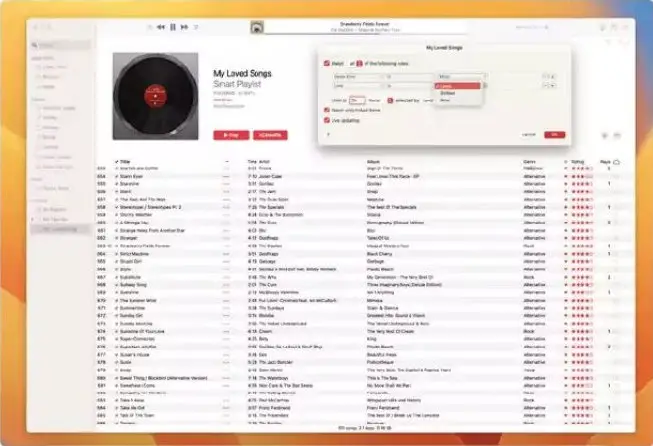
Your smart playlist is ready! Create it by going to File > New > Smart Playlist and use criteria like ‘Love is Loved’ to refine your selection. Ensure ‘Match only ticked items’ is selected for accuracy.
Hope this tutorial will help you manage your Apple Music library for duplicate files and let you enjoy your music catalogue with ease.


Comments