Despite having robust cybersecurity measures in place, computer mishaps can still occur. It might not necessarily be due to malware; hardware failures like a malfunctioning hard drive can lead to data loss. To safeguard your data, it’s essential to have a reliable backup system in place.
Creating Backups
Computers can be unpredictable, which is why ensuring that your files and critical data are securely backed up, and easily restorable, is crucial. Fortunately, this process is straightforward.
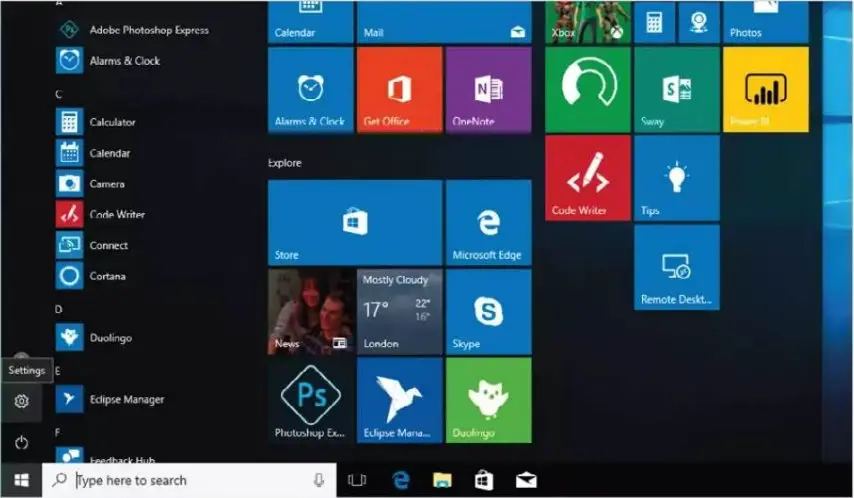
STEP 1
From its early versions, Windows has included backup tools. Windows introduced the File History backup tool, which simplifies the process of creating stable and regular backups of important files. Start by clicking the Windows Start button and selecting “Settings” from the menu.
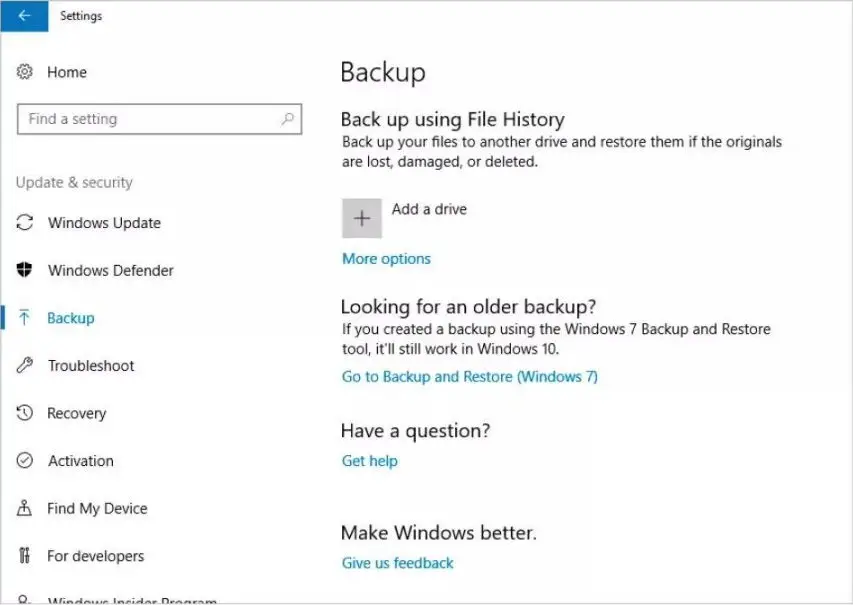
STEP 2
In the Settings menu, click on the “Update & Security” icon, followed by the “Backup” option on the left-hand menu. You’ll see several options: “Add a Drive“, “More options“, “Go to Backup and Restore (Windows 7),” along with help and feedback links.
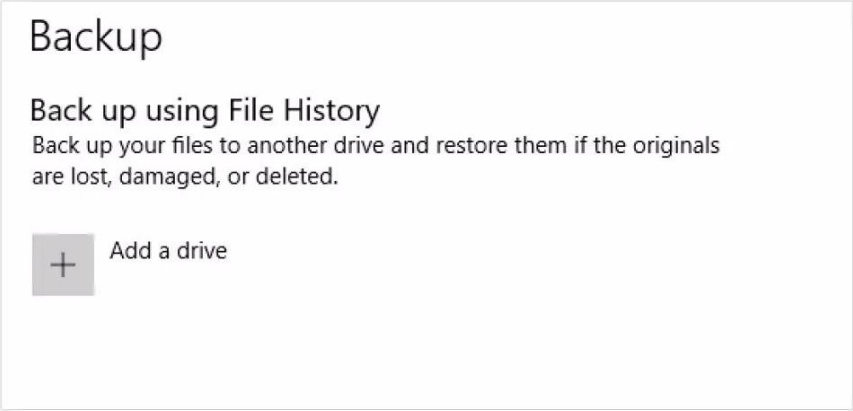
STEP 3
Ideally, you should insert a reasonably-sized USB stick or use a second hard drive in your computer. If you have a USB stick, insert it now. If you own a second hard drive, power off the computer, install it, and boot back into Windows. Once done, click on the “Add a Drive” icon.
STEP 4
Windows will search for any suitable drives to which it can back up your files. When your drive or USB device is displayed, click the drive link. Notice that an “Automatically back up my files” switch button has appeared where “Add a drive” was.
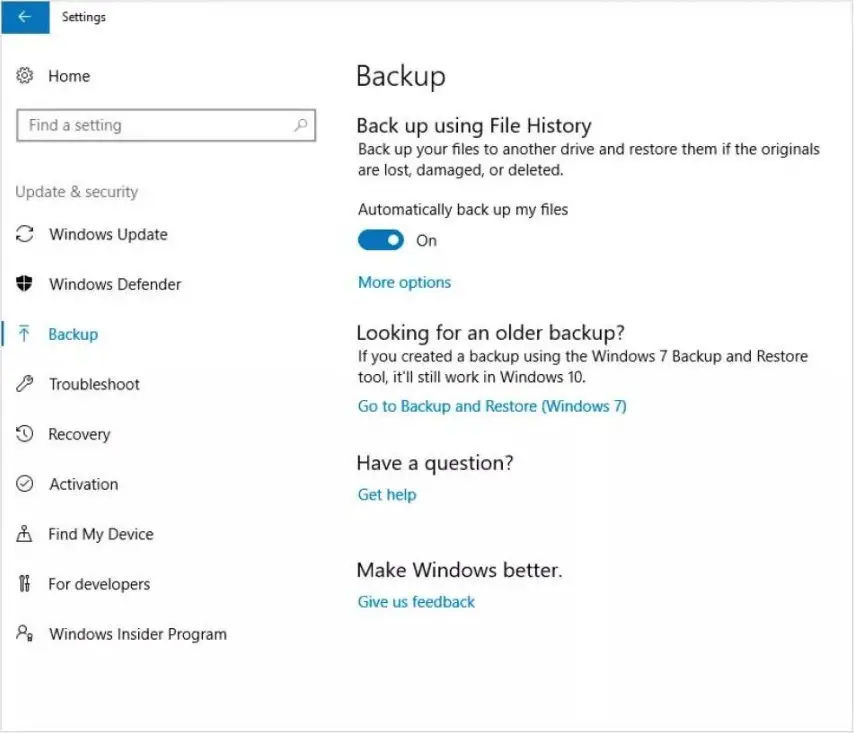
STEP 5
Click on the “More Options” link beneath the switch button; this will open the Backup Options console. Here, you can set the backup schedule, choose the location, select which folders to include in the backup, and specify how long Windows should retain your backed-up files.
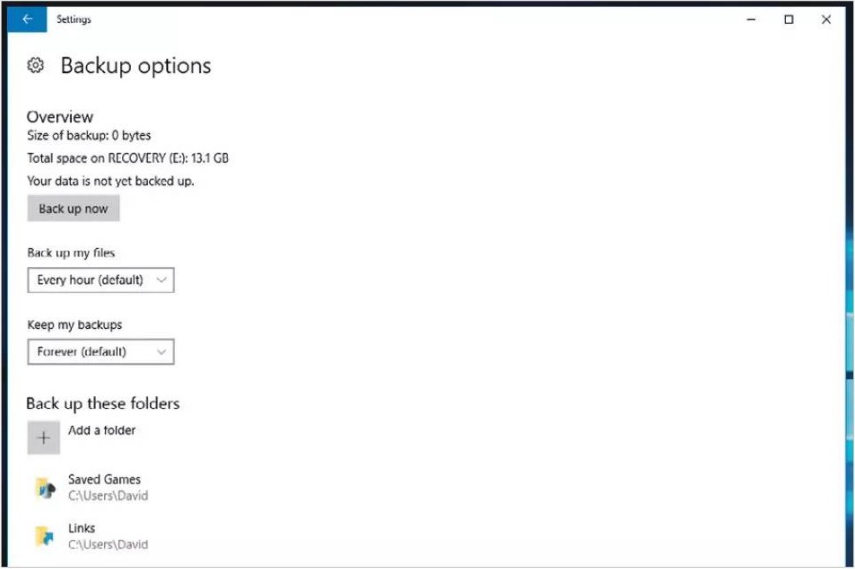
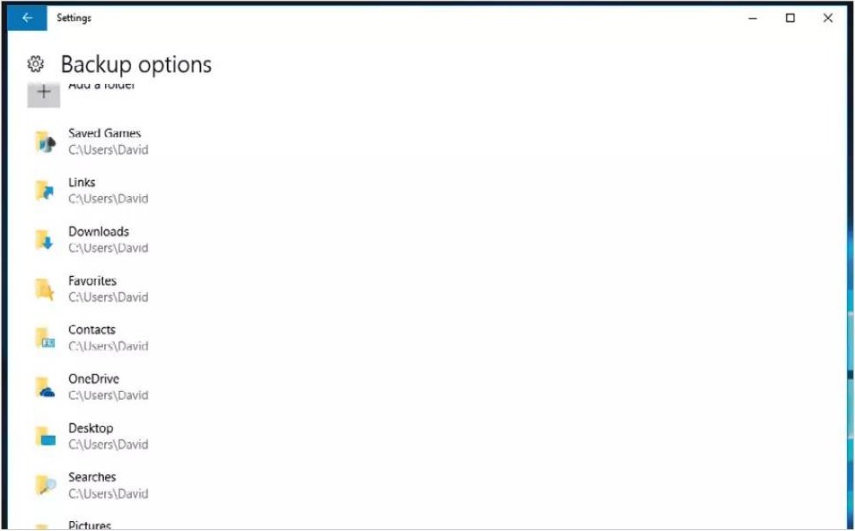
STEP 6
Scrolling through the Backup Options console, you’ll see that your entire user folder within Windows has been added by default. This includes folders for Music, Videos, Searches, Camera Roll, Contacts, Favorites, and more.
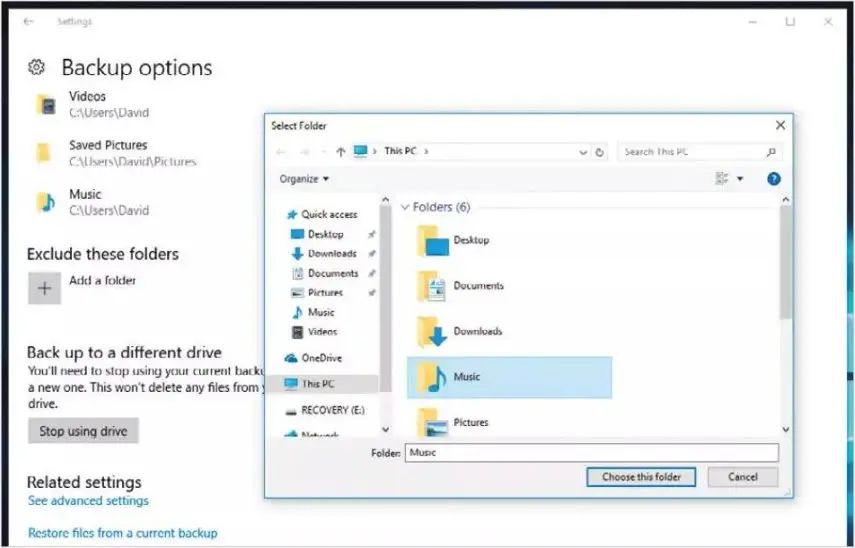
STEP 7
At the bottom of the console window, you have the options to stop using the selected drive and to exclude any folders from the default backup. If you wish not to back up folders like Music or Videos, click “Add a folder” on the “Exclude these folders” icon, then select the folder to exclude and click “Choose this folder“.
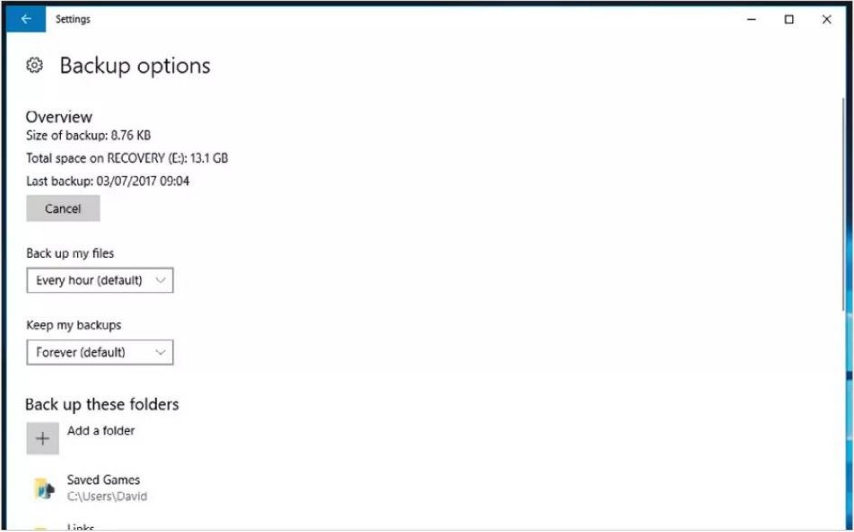
STEP 8
When you’re ready to start the backup, you can click the “Back up now” button at the top of the Backup Options console window. Alternatively, you can wait for the default schedule to kick in, typically after an hour. The duration depends on the size of the files within your backup folders.
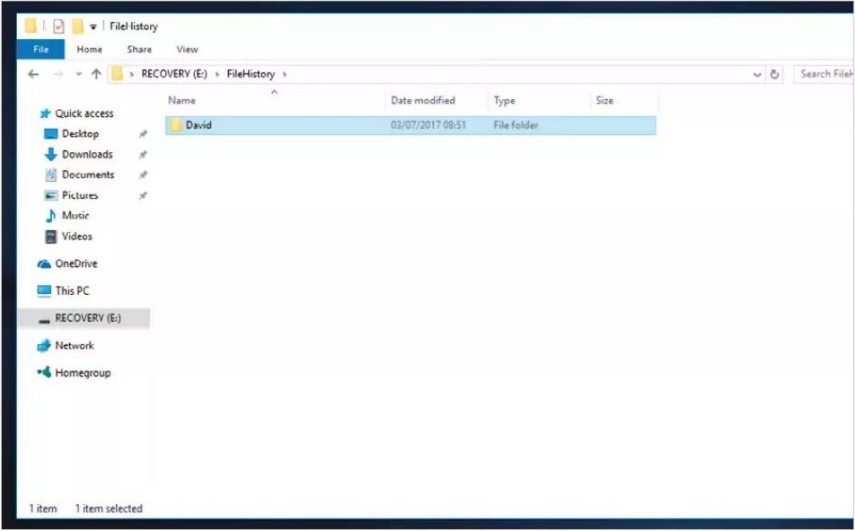
STEP 9
The backed-up files will be stored on the chosen backup drive within a folder called “FileHistory“. Inside that folder, you’ll find specific user folders. If you use File History backups for more than one user, their usernames will also be listed here.
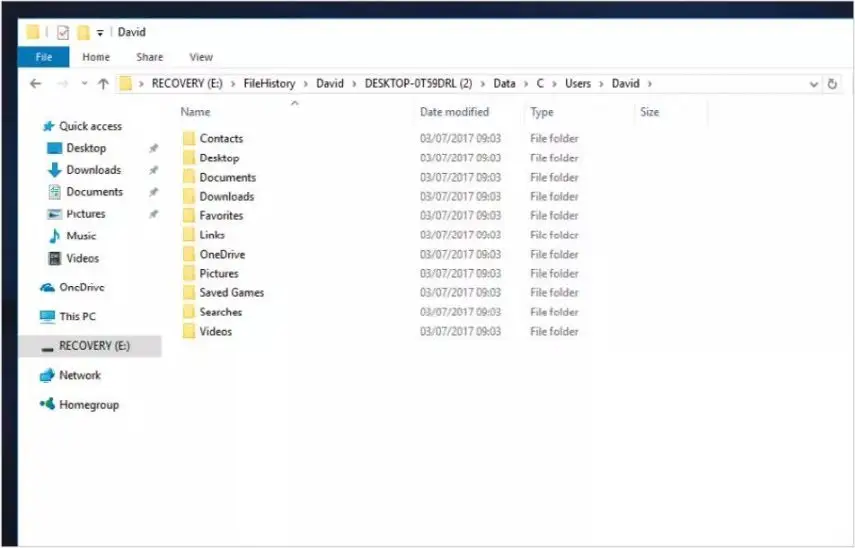
STEP 10
Digging deeper into the folder layers reveals additional default folders containing essential XML data used by Windows to store chosen options. You can locate the actual backed-up files in the “Data” folder, organized in the same folder structure as on your system (e.g., C > Users > Name > Documents, and so on).
In a world where computer mishaps can strike at any moment, safeguarding your data through regular backups is a wise move. Windows already built-in tools like the File History backup to simplify this process, ensuring that your crucial files are securely stored and readily restorable.
By following the steps outlined above, you can establish a reliable backup system that protects your valuable data. Remember, in the digital age, preparation is the key to minimizing the impact of unexpected computer issues. So, take the time to back up your data and enjoy peace of mind knowing that your important files are safe and recoverable whenever you need them.

Comments