Ever since Windows 95, Microsoft has provided a useful feature that allows users to create a recovery drive. This recovery drive can be used in troubleshooting a Windows PC that encounters boot issues by offering various recovery options. If you haven’t done so already, it’s highly recommended that you create a Windows recovery drive.
Prepare for Recovery
You’ll need an 8GB USB drive, at the minimum, to create a recovery drive successfully. Be aware that this process erases all contents from the drive, rendering it unusable for other purposes, so make sure it’s clearly labeled and kept in a secure location.
SEE ALSO:
How to Find Which Windows Software or Apps are Sending Information
How to keep Windows 11 after cloning the drive
Where to get your BitLocker recovery key for Windows
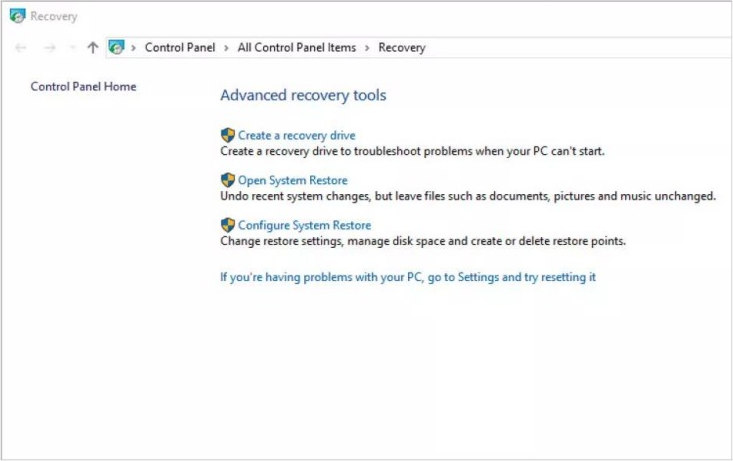
Step 1
Insert the USB drive into your PC and close any Explorer windows that pop up upon insertion. Click the Windows Start button, type “recovery“, and select the “Recovery Control Panel“. In the Recovery Control Panel, you’ll find several options, but you want the first one: “Create a recovery drive“.
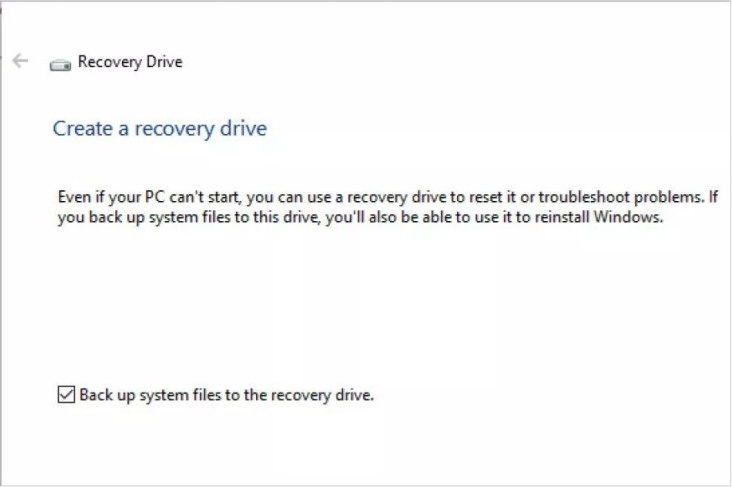
Step 2
Click the “Create a recovery drive” link and confirm the User Account Control (UAC) authentication prompt that appears. You will be presented with the choice to back up essential system files to the recovery drive, in addition to the regular recovery options. It’s advisable to select this option, as it can replace these critical files in case of a boot failure. Click “Next” to proceed.
Step 3
There will be a brief wait while Windows examines available locations for creating the recovery drive. Afterward, provided you inserted an 8GB or larger USB stick before starting the process, you’ll be prompted to select the destination from the options found by Windows.
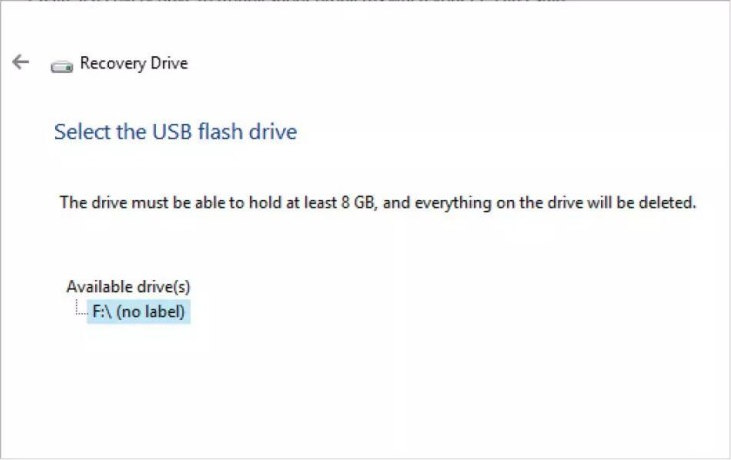
Step 4
In this example, there is only one possible destination, the F:\ drive. If you have multiple possible destinations, make sure to choose the correct USB drive for your recovery drive. Once you’re ready, click “Next“.

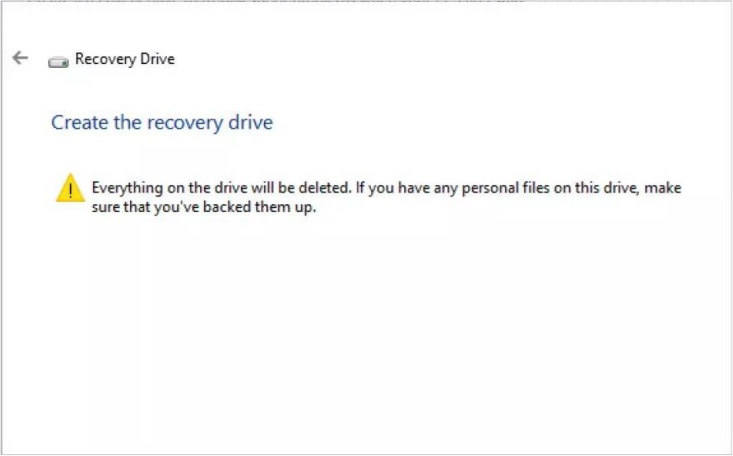
Step 5
Before committing to creating the recovery drive, Windows will provide one last warning. Remember, all the contents on the USB stick you’ve chosen for the recovery drive will be erased during the creation process. Ensure that any files on it are backed up to another location.
Step 6
When you’re ready, click “Create” to initiate the process. The duration may vary based on the USB stick’s speed, as Windows prepares, formats, and copies utilities and files to the USB recovery drive.

Step 7
Upon completion of the process, you’ll receive a message stating that the recovery drive is ready. The only available option is to click “Finish“, which will close the recovery drive window and take you back to the Recovery console.

Step 8
Keep the recovery drive in a secure place as it can be used to restore essential system files if your system encounters issues preventing it from booting. Should an issue arise, you will see the Windows safe mode boot options when trying to power up your computer.
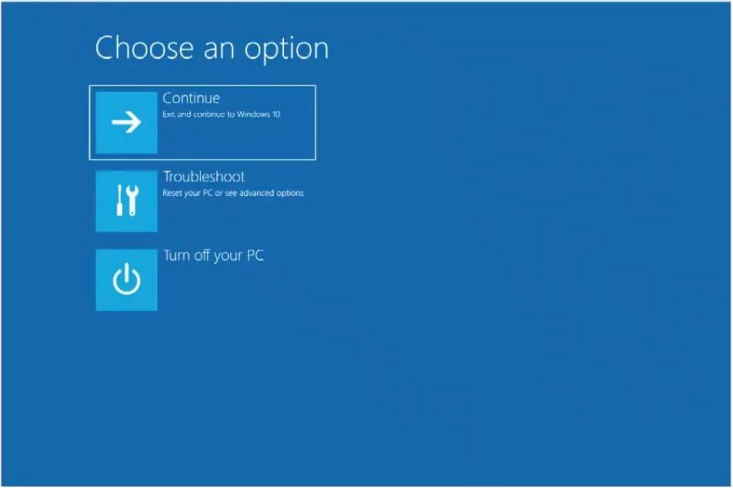
Step 9
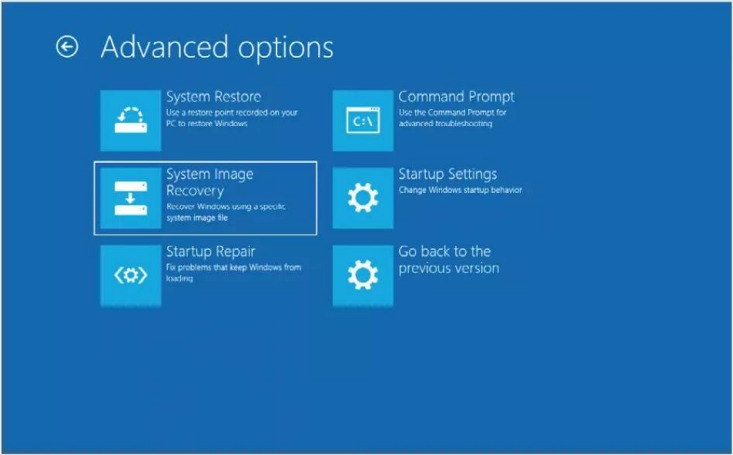
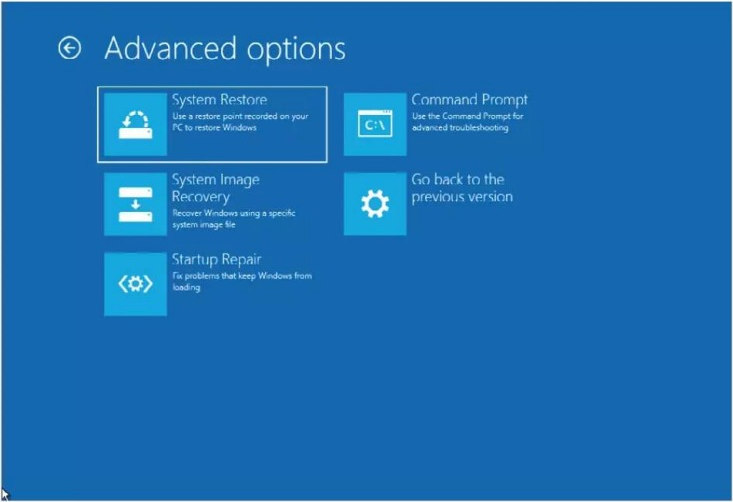
From the safe mode boot options, select the “Troubleshoot” tile, followed by “Advanced Options“. From there, you can choose between the “System Restore“, “System Image Recovery“, and your recovery drive to help recover Windows.
Step 10
Alternatively, configure the BIOS settings to boot from the newly created recovery drive and follow the on-screen instructions to initiate the recovery process. Begin by selecting your language and then choose the “Troubleshoot” option, followed by selecting one of several recovery options.
In conclusion, creating a Windows Recovery Drive is a proactive step that every PC user should consider. It can rescue your system in the event of boot problems and other critical issues. With a straightforward process and the right-sized USB drive, you can ensure that you have a safety net to fall back on when things go awry.
So, don’t wait until you encounter problems. Take the time to create your Windows Recovery Drive today and store it in a safe place. You’ll have peace of mind knowing that you’re prepared to tackle any unforeseen system challenges. Whether you need to restore vital system files or recover your system from unexpected errors, your recovery drive is there to help you navigate these situations with confidence.

Comments