Windows 10 offers a user-friendly approach to managing the location where your downloaded applications and software are stored. This means you no longer need to stress about relocating your apps to another internal drive or even a removable USB flash drive when the need arises to free up space on your primary hard drive. With just a few clicks, you can effortlessly move apps to the storage area that best suits your needs.
SEE ALSO: 25 Must Have Android Apps
Change where apps are installed
You may not realize, but Windows 10 allows you to choose the hard drive on which your applications are installed, rather than just relying on the default drive chosen by the operating system. This can be particularly helpful for routine Windows 10 maintenance.
- By default, any apps you install are stored on the primary partition of your hard drive, typically the C drive. However, you have the flexibility to designate any other connected drive, including both internal and removable external hard drives (such as USB flash drives), as the destination for your applications.
- In the more recent versions of Windows 10, achieving this is relatively straightforward. Start by opening the main Settings and selecting System. Within System, you’ll find a comprehensive list of sections, but the one you need is the Storage section. Here, you’ll be presented with a visual representation of your storage drives as a whole.
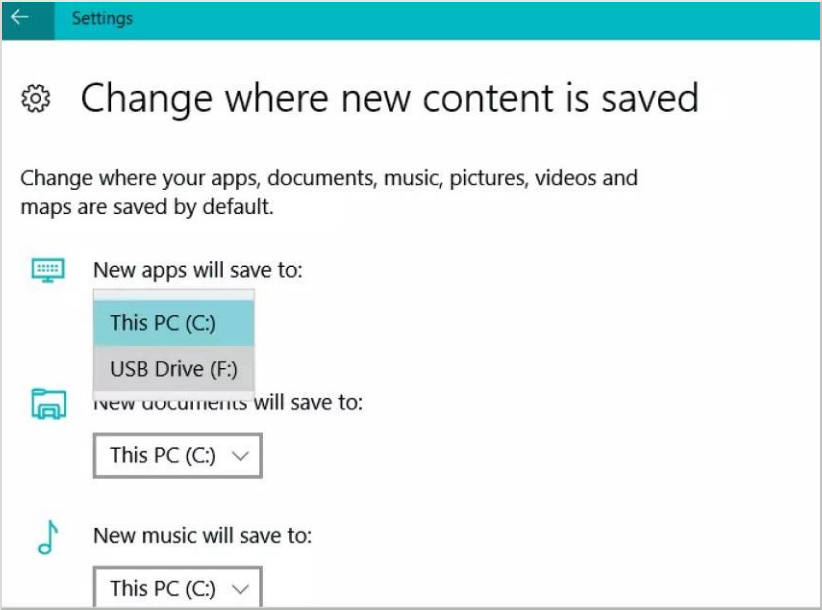
- Click on ‘Change where new content is saved,’ and a new list will appear. In this list, you can observe the default storage locations for apps, documents, music, photos, videos, and more (unless these settings have been altered previously). Each item on the list has a dropdown menu beneath it.
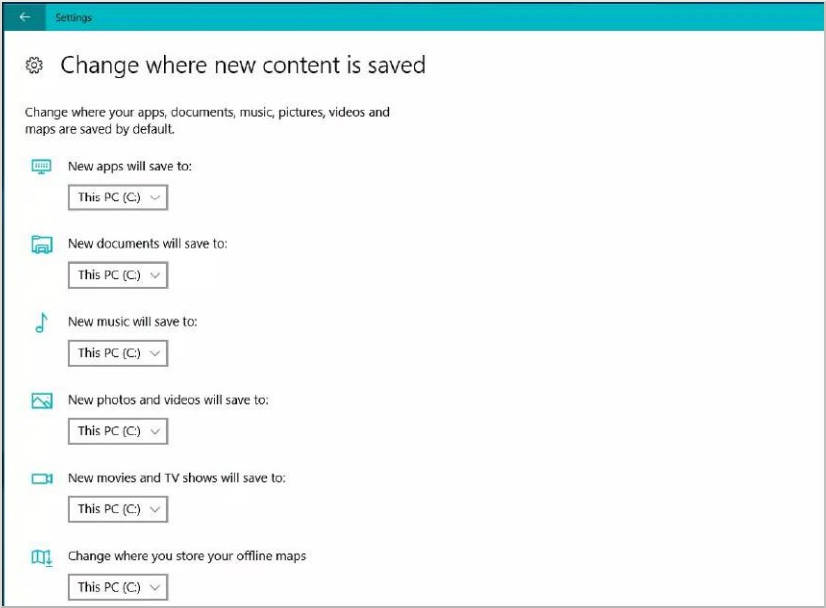
- Below the ‘Apps’ category, select the desired drive or partition where you want apps to be saved. It’s important to note that this change will only affect the storage location of apps installed from the Microsoft Store after this modification. Applications that were previously installed will remain on the drive that was designated when they were added.
Moving Installed Applications
For individuals with numerous installed apps, relocating them to an alternative drive offers one of the simplest methods to free up space on your primary storage volume. Keep in mind that not all applications can be moved.
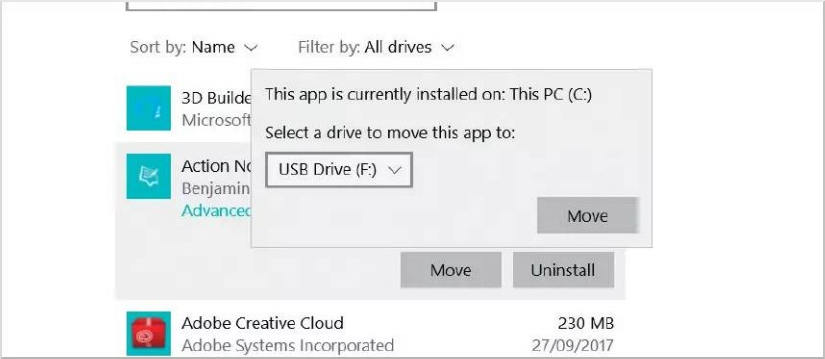
- You have the option to move already installed apps to a different drive. There’s no limit to the number of different drives you can use for storing apps. To do this, navigate to Settings > Apps > Apps & features. Select an app and click the ‘Move’ button.
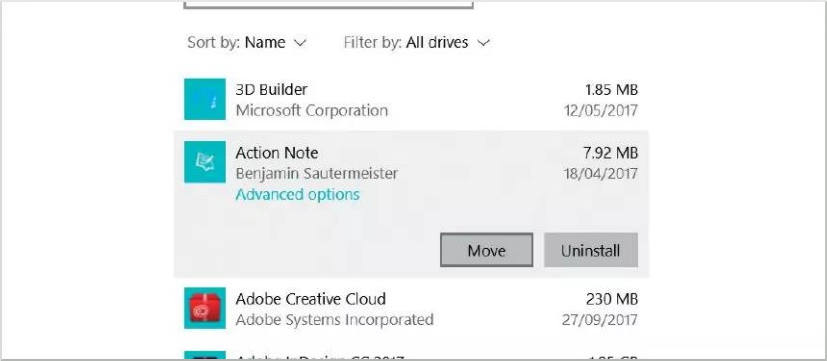
- You’ll be presented with the app’s current installation location and prompted to select another drive where the app will be moved. Drives are listed in a dropdown menu, and their drive letters are shown for easy identification. Once you’re satisfied with your choice, click ‘Move’ again.
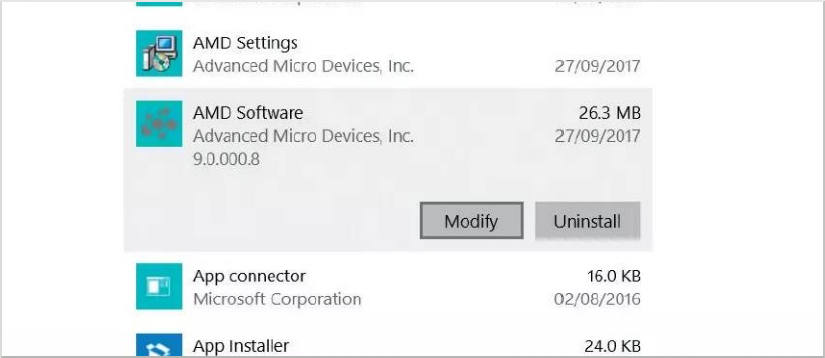
- You may encounter a ‘Modify’ button instead of the ‘Move’ button. This indicates that the app is a traditional desktop application and cannot be moved. If you see a ‘Move’ button that is grayed out, it signifies that the app is a Microsoft system app, and such apps also cannot be relocated. You can only move apps installed from the Windows Store.
- It’s important to note that if you move or install apps on an external drive, the apps will cease to function if the drive is disconnected. This explains why Microsoft system apps cannot be moved to a different drive. Apps that must always be accessible should be left in the primary system hard drive partition.

Uninstalling Apps and Software
There are two primary methods for removing apps and other software from your Windows 10 computer, but not all options may be available in every situation. It’s beneficial to be familiar with both approaches.
Uninstalling via Settings
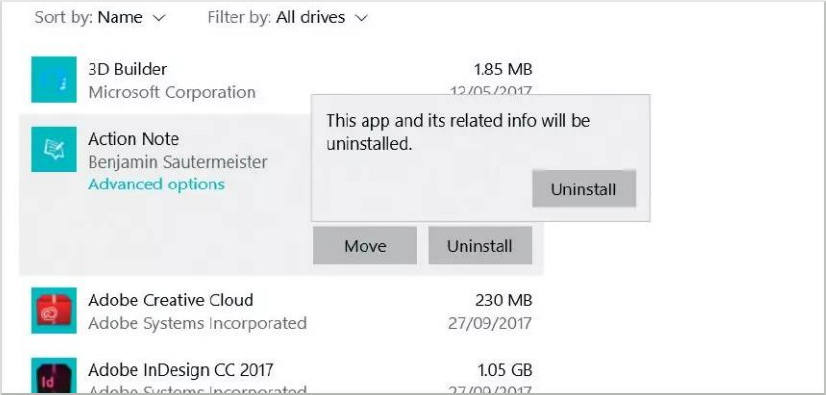
In Windows, the most straightforward way to uninstall apps or other software is through the Settings menu. Open Settings and select ‘Apps.’ Choose the program you want to remove and click ‘Uninstall.’ Follow the on-screen instructions. Be aware that certain apps integrated into Windows cannot be uninstalled.
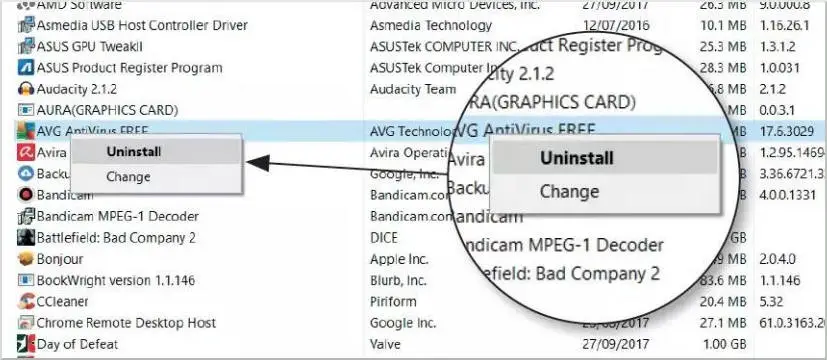
Uninstalling via Control Panel
You can also uninstall software through the Control Panel. In the search box on the Start menu, type ‘Control Panel,’ and select ‘Control Panel’ from the results. Then, choose ‘Programs’ > ‘Programs and Features,’ and select the program you wish to remove. To repair the program, select ‘Repair’ or, if that option isn’t available, choose ‘Change.’ To completely uninstall the program, click ‘Uninstall.’
More: Top 5 Best Feature-Rich Free Video Editing Software (Cross-Platform)

Comments