Exporting videos from DaVinci Resolve can be somewhat daunting, and the software’s manual which has more than 4,500 pages is difficult to understand and may not always be the easiest guide to follow. In this guide, we aim to simplify the process, providing you with straightforward steps to help you export your videos effectively. So, let’s explore the export process step by step to make your video exporting experience as smooth as possible.
SEEL ALSO:
To start, open the software and locate the “Deliver” button at the bottom of the interface.
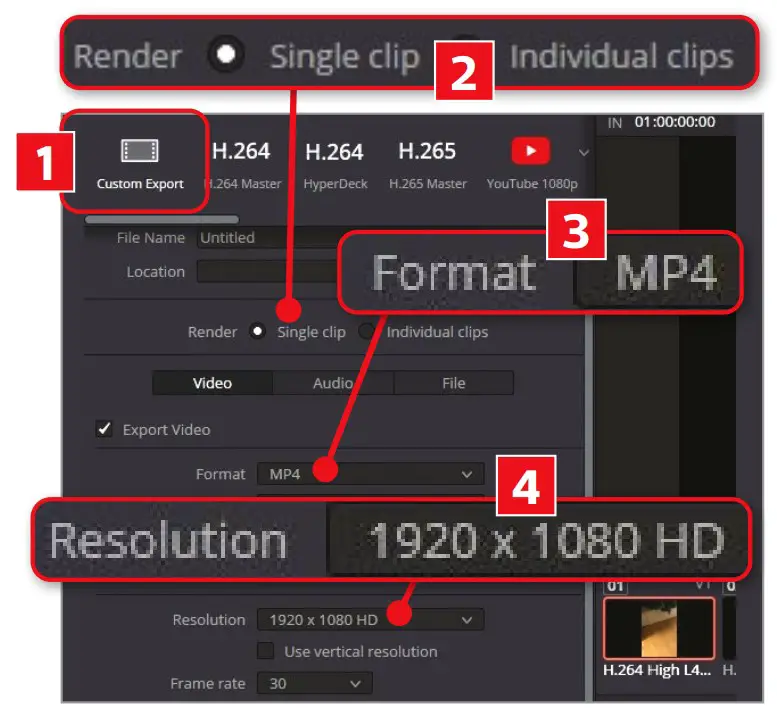
You’ll find various export presets at the top, designed for platforms like YouTube, H.264, H.265, as well as options for exporting to Apple’s Final Cut and Adobe Premiere. You can select one of these presets, or if you prefer more control, click on the “Custom Export” icon (shown as “1” in screenshot below) to customize your settings. This includes tasks like renaming the video and designating the save location.
Next, specify the section of the video you wish to export. Anything below the gray bar on the timeline will be included in the export.
In the “Render” section, choose between exporting a single video or individual clips (highlighted as “2“).
Then, access the “Format” menu and select a format, such as MP4 (“3“). Ensure that the chosen resolution matches your video (“4“).
Once you’ve completed the export process, launch MoviePlus X6. Click on “File,” followed by “Import.” Navigate to your exported video file and open it. Your video should now be readily available for viewing and further editing. Keep in mind that these instructions might vary slightly based on the specific versions of DaVinci Resolve and MoviePlus X6 that you are using.

Comments