“Tagging Photos with Location Data” opens up a world of possibilities for organizing and enhancing your photo collection. Geotagging, the process of adding location information to your photos, goes beyond just marking where an image was taken. It creates a dynamic connection between your photos and the places you’ve explored.
In this guide, we’ll delve into the art of geotagging, exploring how it can transform your photo library and the way you relive your memories.
Adding location data to your photos is a process similar to tagging people. For photos that already have their locations identified, there are two modes: Unpinned and Pinned. Let’s dive deeper into the step by step process of geotagging your photos.
SEE ALSO:
Recover Details and Bring back that “POP” in Your Photos (Lightroom)
What is the Difference between JPEG and RAW Images in Photography?
20 Useful and Inspirational Photoshop Tutorials
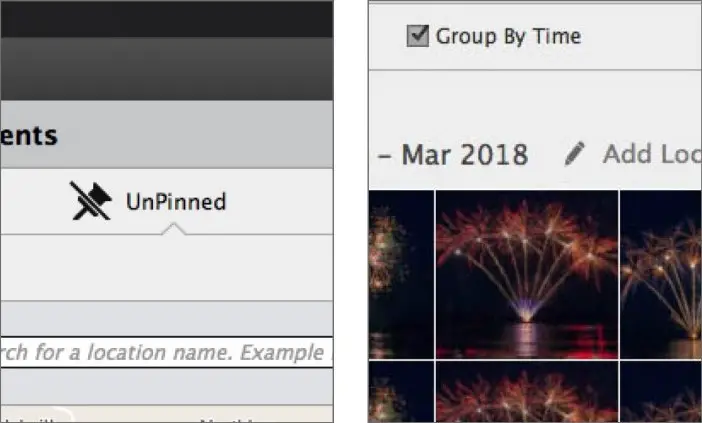
To get started, click on the Places tab to access the Places workspace. At this point, you’ll be in the Unpinned category, where you can see all photos without location data. If you click on “Group By Time,” your photos will be displayed in chronological order.
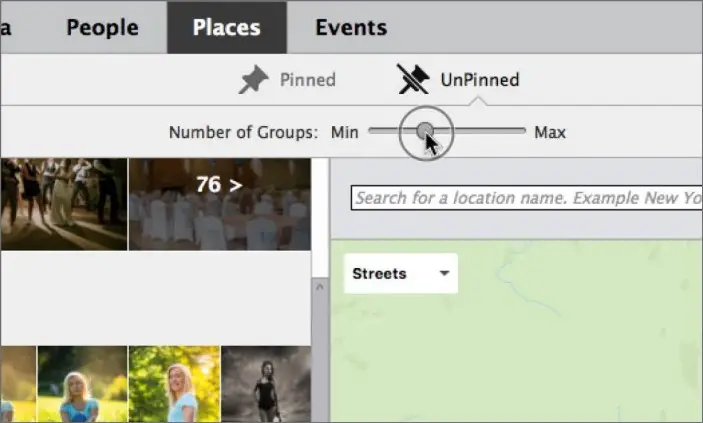
From this view, you have the option to adjust the “Number Of Groups” displayed on the left panel. By moving the slider left or right, you can increase the number of groups for a more detailed examination or reduce it for a broader view of all the photos you’re currently browsing.
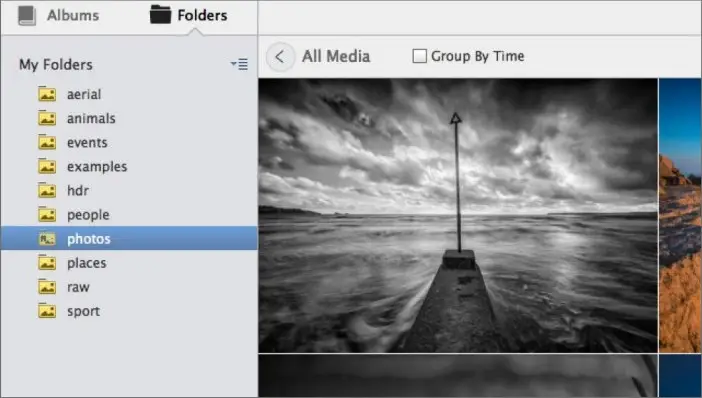
In our example, we want to tag a specific group of photos taken at a location called “Hound.” These photos are stored in a folder named ‘photos,’ so we’ve used the folder view to locate them. Chronological order isn’t a concern for us in this case. We’re looking to tag four images.
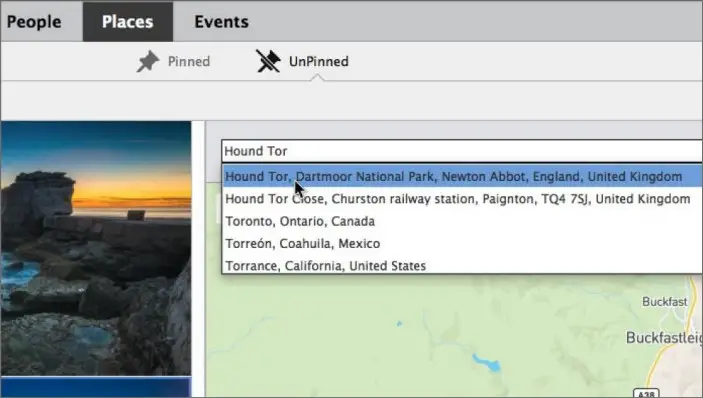
On the right side of your Places workspace, you’ll find a map where you can view any pinned photos. If you know the area you’re interested in on the map, you can zoom directly to that location. Alternatively, you can search for a location by entering its name in the search bar at the top of the map.
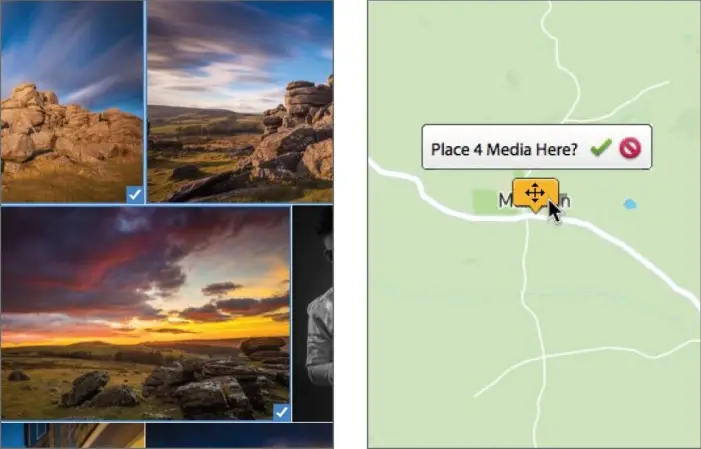
In the media view panel on the left, press the Cmd key (or equivalent) and select the images you want to tag with a location. Then, input your desired destination in the search bar above the map. Hit enter, and you’ll see a list of matching locations. Click the correct one, and your selected media will be geotagged to that spot.
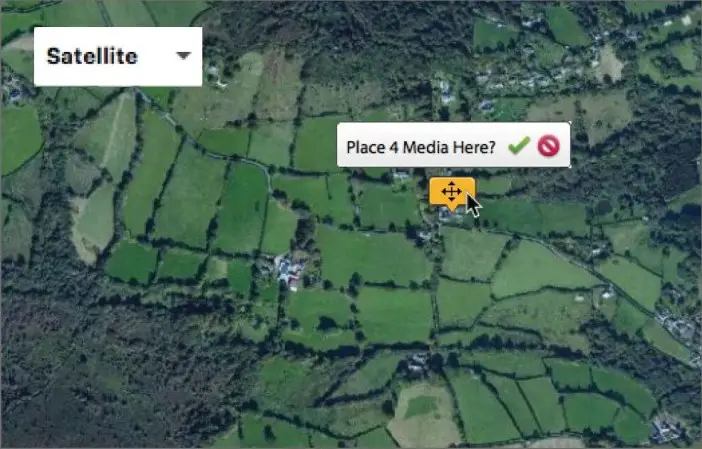
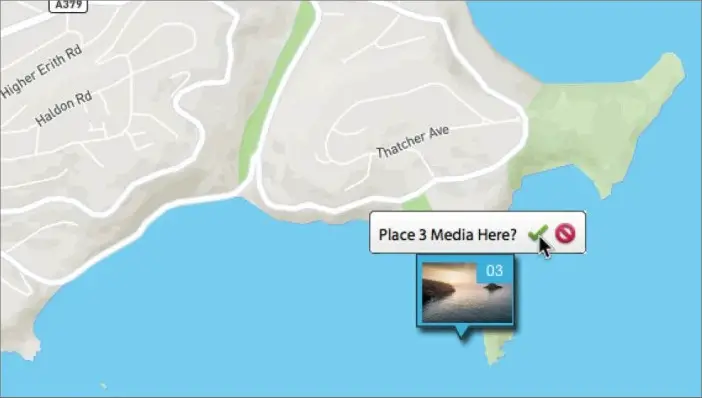
Sometimes, you might notice that the pinpointed location on the map isn’t perfectly accurate. No worries; you have the option to manually drag the pin to the precise spot. If you’re having trouble identifying the correct area, you can switch from the Streets view to Satellite for a clearer view of the terrain.
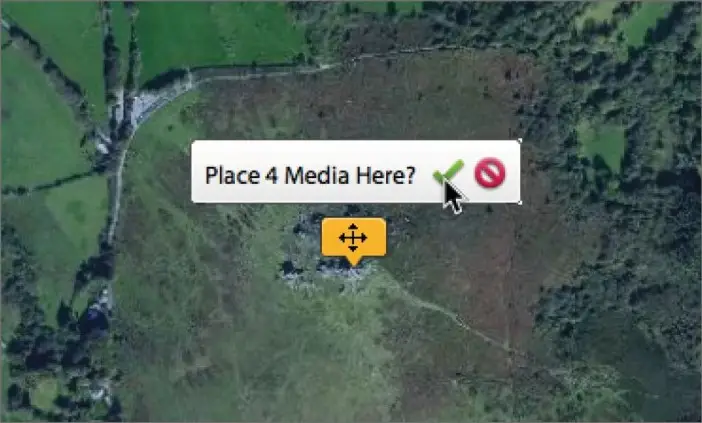
With a better view of the land, simply drag the pin to the correct location, and click the “Place 4 Media Here?” green checkmark to confirm the placement. You can also double-click the pin to see the images associated with that location. These images will now also appear in the Pinned category view.
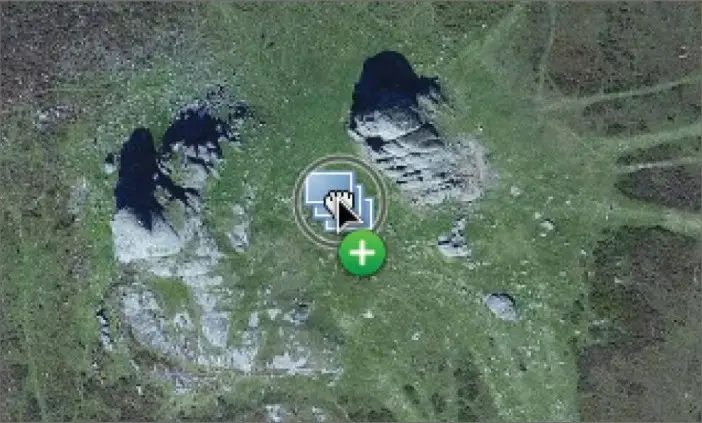
Another method is to navigate directly to a location on the map and then highlight the pictures you want to geotag there. Once highlighted, you can drag and drop the selected photos directly onto the map at the location you’ve chosen. These photos will also appear in the Pinned category.

If you import photos with GPS data, they will be automatically placed on the map in the Places workspace as soon as their data is analyzed. For example, our aerial photos taken on the Devon coast were accurately placed.
In case the placement area is too broad, you can edit the location information by clicking on the pinned thumbnail. This allows you to input more precise location details or move the pin to a new location.
More: 10 Best Websites to Create Free Cartoons from Your Photos

Comments