Photography has the remarkable ability to capture moments in time, but it’s the subtle details that truly breathe life into an image. The art of detail recovery plays a vital role in bringing out these hidden gems within your photographs. Whether you’re a seasoned pro or just starting your photographic journey, the power to reveal these concealed intricacies can transform your photos from ordinary to extraordinary.
SEE ALSO: How to add Studio Lighting to a Portrait in Lightroom
In this exploration, we’ll dive into the techniques that allow you to recover and enhance the finer elements in your pictures. From mastering the interplay of highlights and shadows to the magic of post-processing, we’re about to unlock the secrets that will elevate your photography game.
Let’s see how to create captivating, visually stunning images.
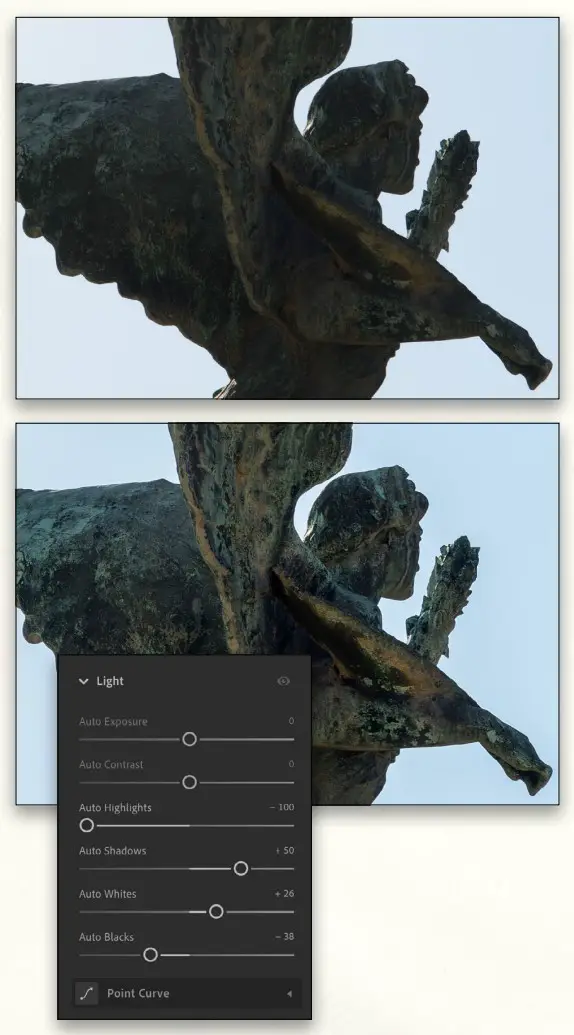
An immediate and straightforward approach to escape the somewhat flat quality often associated with RAW files is by implementing a technique in the post-processing of photographs. Begin by recovering details using the Highlights slider, then elevate the Whites slider to infuse brightness and punch back into the image. Apply this same method to the Shadows slider to unveil the hidden nuances in the darker areas, and offset this adjustment by reducing the intensity of the Blacks slider to deepen these shadowed regions.
When working with both highlights and shadows, the aim is to strike the delicate balance of retrieving just the right amount of detail in the extreme tonal areas without taking into the territory of a muddied or over-processed appearance. This technique, similar of the renowned zone system, not only helps preserve a dynamic contrast across the entire frame but also effectively broadens the overall dynamic range of the image.
More:

Comments