Editing the face in a set of portraits was once a very tedious process. You’d have to manually edit each individual photo, as syncing would only work if the faces were exactly aligned. The advent of AI masking and, more recently, People masking changed that.
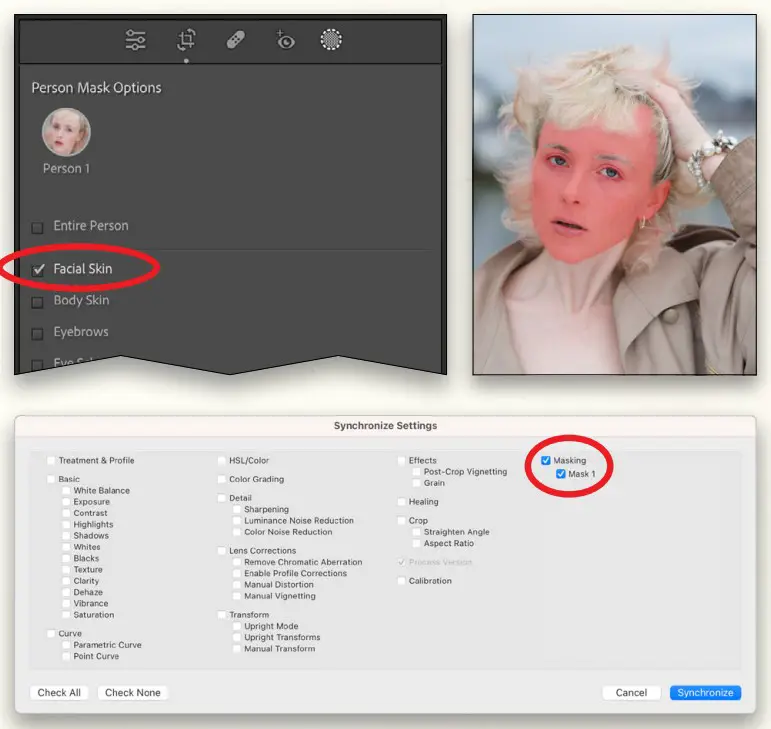
When you open the Masking panel (gray circle with dotted outline), the People section indicates that it’s Detecting People in the photo. Once it’s done, click on the person you want to retouch. By default, the Entire Person is selected, but click Facial Skin instead, and then click the Create Mask button. The face mask will be visible on the image preview.
From the Preset menu at the top of the controls for editing the mask, choose Soften Skin (Lite). You can tweak these settings to suit your image.
These settings can then be synced to other photos where the AI will find and mask the face and correctly apply your retouch. Just exit the Masking tools, select all the images that you wish to sync, and click the Sync button below the right-side panels. In the Synchronize Settings dialog, click Check None, turn on the Masking option and the mask that appears below it, and click Synchronize.

Comments