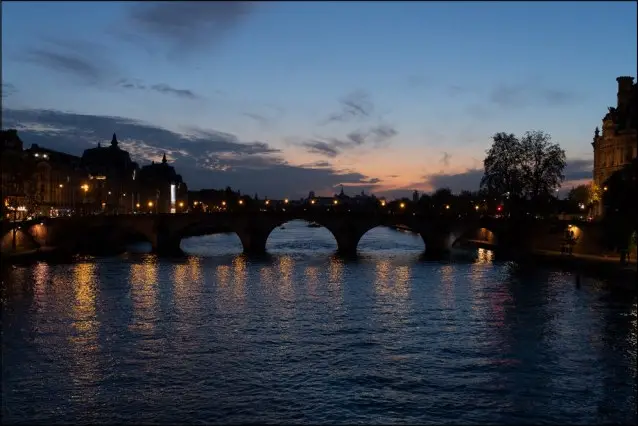
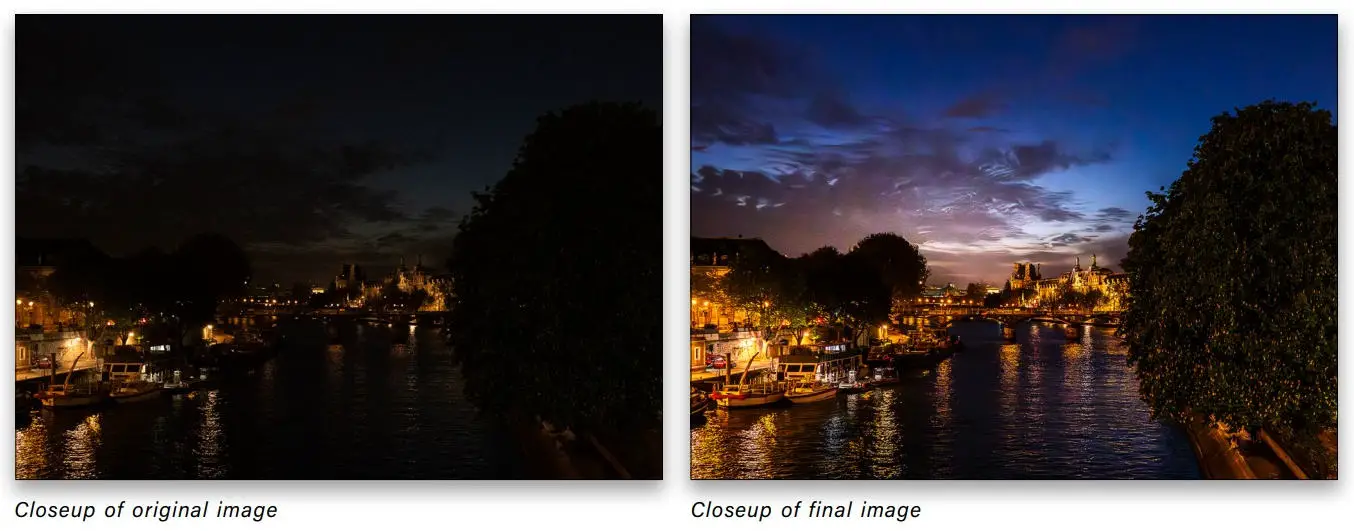
In this article, we’ll demonstrate how to minimize noise in your photos using a highly noisy image taken in Paris, captured handheld at night at 4000 ISO. Initially, we’ll showcase the traditional method of noise reduction in a photo, followed by the introduction of a new approach incorporating an impressive AI-based feature in Lightroom. We’ll also highlight a couple of recent updates for practical enhancements. Let’s get started!
SEE ALSO:
How to Add Creative Color Wash Effects to Your Photos in Lightroom
How to Create Beams of Light in Lightroom Classic
Recover Details and Bring back that “POP” in Your Photos (Lightroom)
THE OLD WAY TO REDUCE NOISE

To begin, we’ll illustrate the conventional approach to removing noise from photos in Lightroom Classic. Start by navigating to the Manual Noise Reduction section in the Detail panel. For this specific image, we’ll set the Luminance to 26. In the Sharpening section, adjust the Amount to 78, aiming for a sum of Noise Reduction and Sharpening Amount close to 100 (as per my old personal formula). Next, set the Masking for Sharpening to 67, eliminating sharpening from the water and sky. While this method significantly improves noise in the image (as shown above), it unfortunately results in excessive blurriness. This level of blurriness is unsuitable for printing and, honestly, is borderline for social media posting.
THE NEW WAY TO REDUCE NOISE

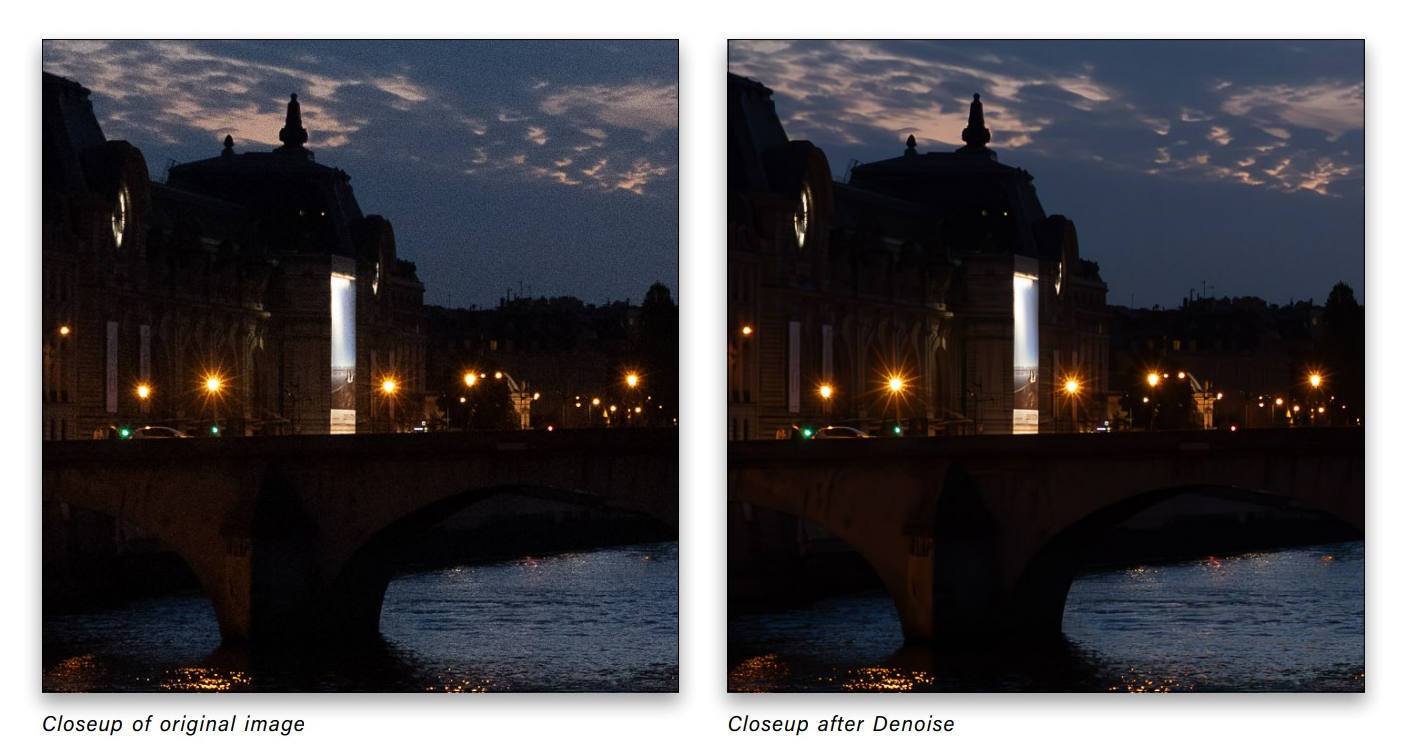
Now, let’s delve into the contemporary method of noise reduction using AI. Click on the Denoise option in the Detail panel, triggering the Enhance Preview dialog. By clicking and holding in the preview area, you can observe the before-and-after of your photo, providing insights into the level of noise removal and sharpness enhancement. In cases where the image is excessively blurry, set the Denoise Amount to an appropriate value (e.g., 70), enable Create Stack, and click Enhance.
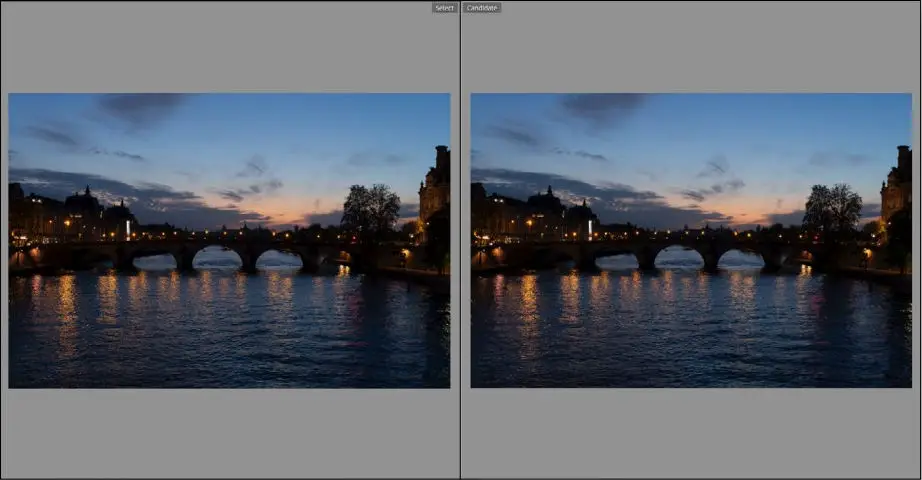
You can compare these two techniques by selecting both photos, pressing C for Compare view, and then pressing Shift-Tab to hide the panels for a larger view. The remarkable effectiveness of AI Denoise becomes quite evident.
ANOTHER EXAMPLE
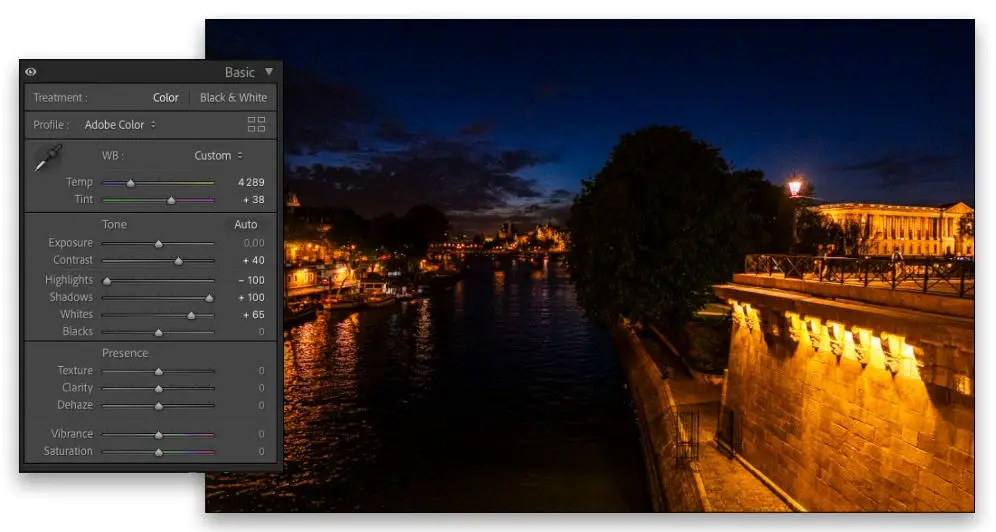
Consider another photo shot at 6400 ISO and underexposed. Let’s first perform a quick retouch to better visualize the details in the photo.
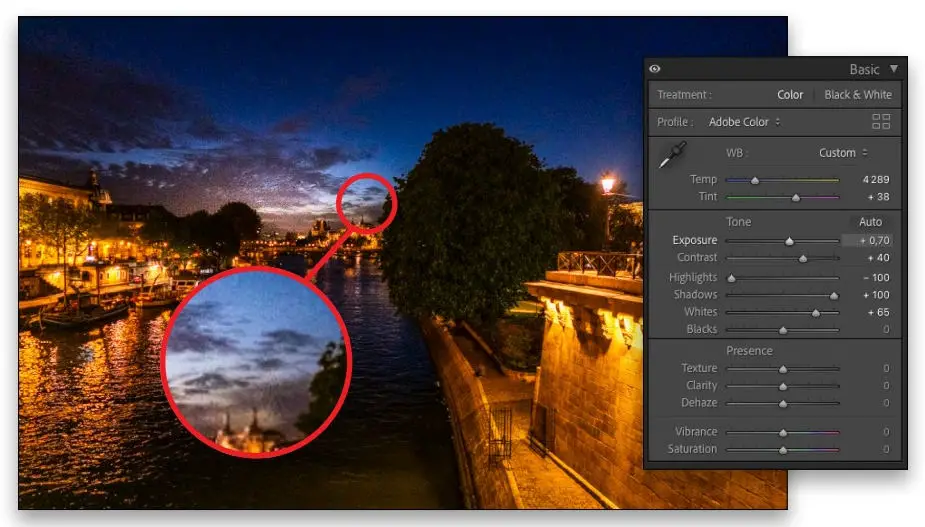
STEP ONE: In the Basic panel, open Shadows to +100, set Whites to +65, Highlights to –100, Tint to +38, Temp to 4289, and Contrast to +40.
STEP TWO: The brightest part of the photo, where the viewer’s eyes will be drawn, is at the bottom right where we don’t want people to focus. To address this, click on the Masking icon (gray circle with dotted outline) and select Linear Gradient. After drawing a Linear Gradient on the lower-right corner, lower the Exposure to –0.66 to darken that area.

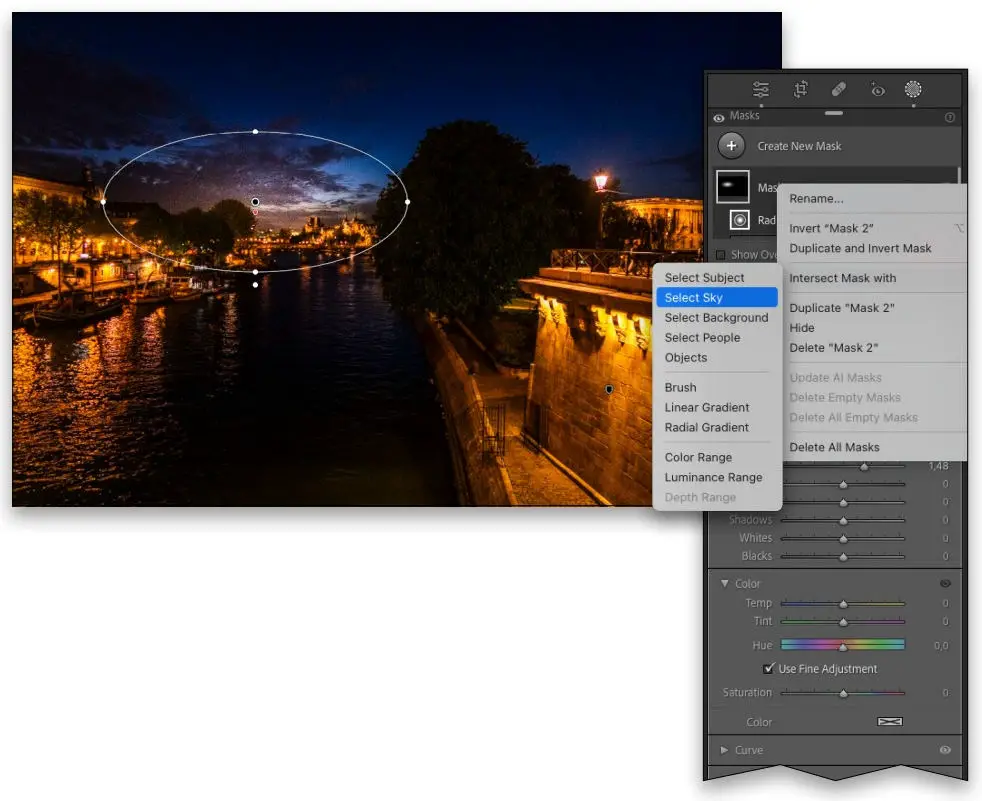
STEP THREE: To guide the viewer’s eyes, use a Radial Gradient. Click on Create New Mask in the Masks panel, select Radial Gradient, draw a gradient where you want to focus the viewer’s attention, and boost the Exposure. Here, we drew the gradient in the sky area near where the setting sun would be, setting the Exposure to 1.48. Now, everything in the gradient is brightened, but we only want the sky to be brighter to make it more natural. Click on the three dots next to the mask in the Masks panel and select Intersect Mask With > Select Sky.
STEP FOUR: Boost the overall Exposure to +0.70 to reveal the noise in the photo.
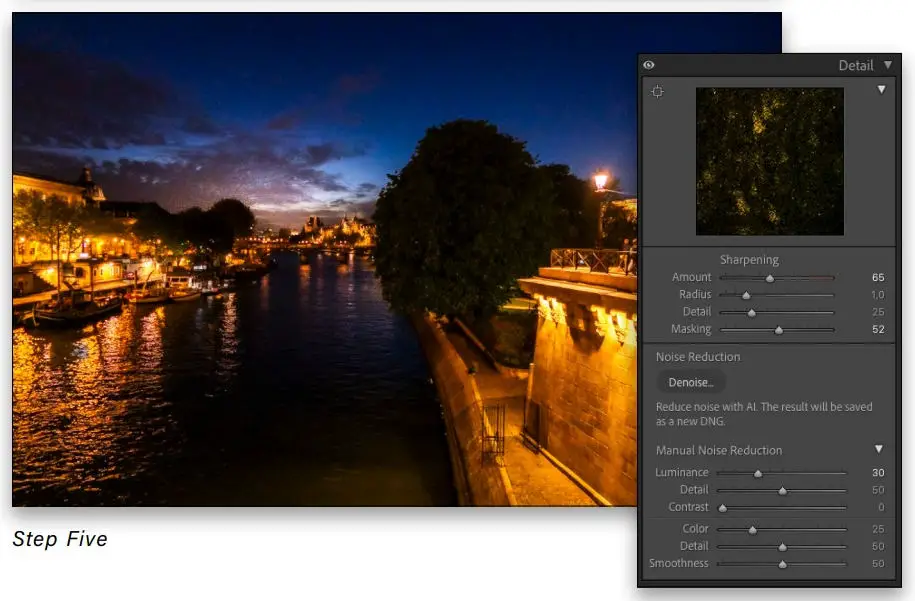
STEP FIVE: For this photo, apply the old Noise Reduction technique with the Luminance set to 30, Sharpen Amount at 65, and Masking at 52. As seen, this photo remains unusable.

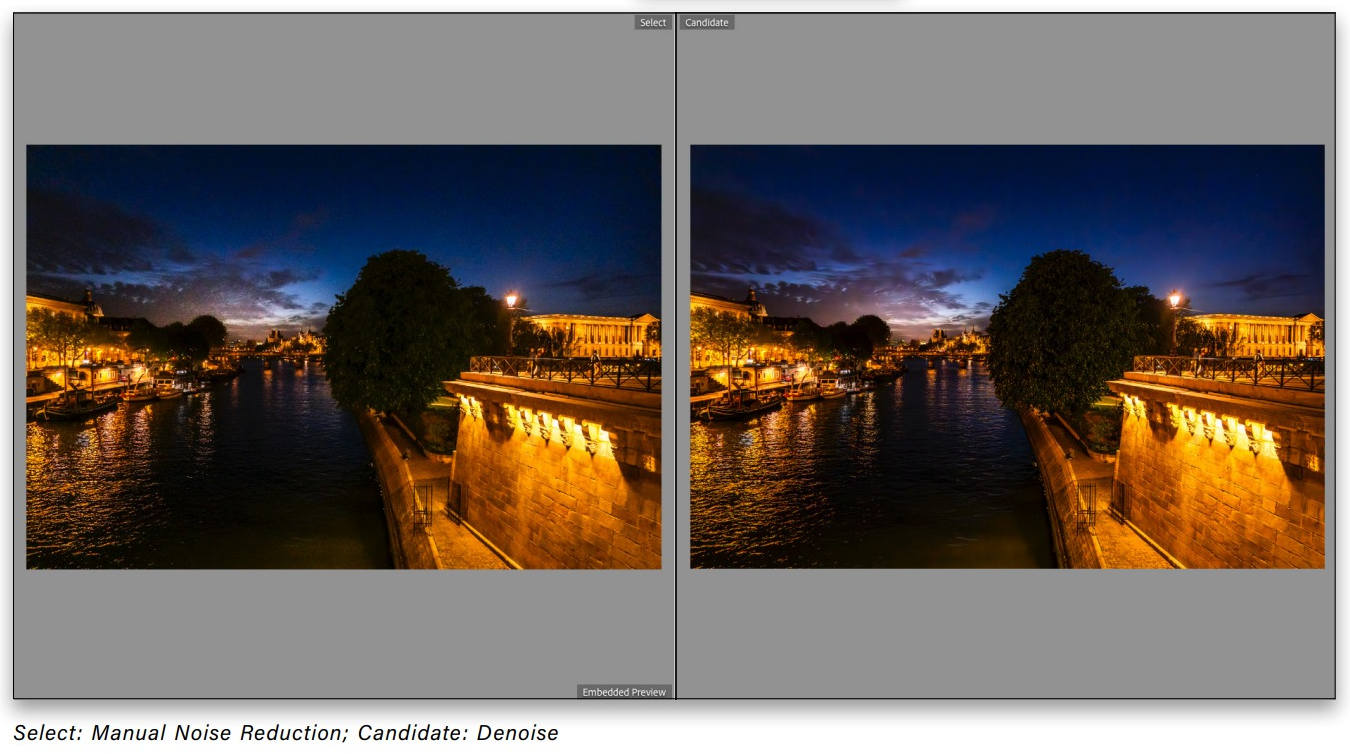
STEP SIX: Now, select the Denoise option and set the Amount to 70. After clicking Enhance, it takes about 25 seconds to render. You can once again compare the two options by selecting both photos, pressing C, and then pressing Shift-Tab. The transformation achieved with Denoise is truly impressive, particularly for night photos.
KEEP YOUR EYE ON THE CURVES
A noteworthy feature recently added is the eye icon next to each panel in the Develop module. When lit up, it indicates that settings in that panel have been used. Click-and-hold on one of those eye icons to see the before version of your image for that specific panel.
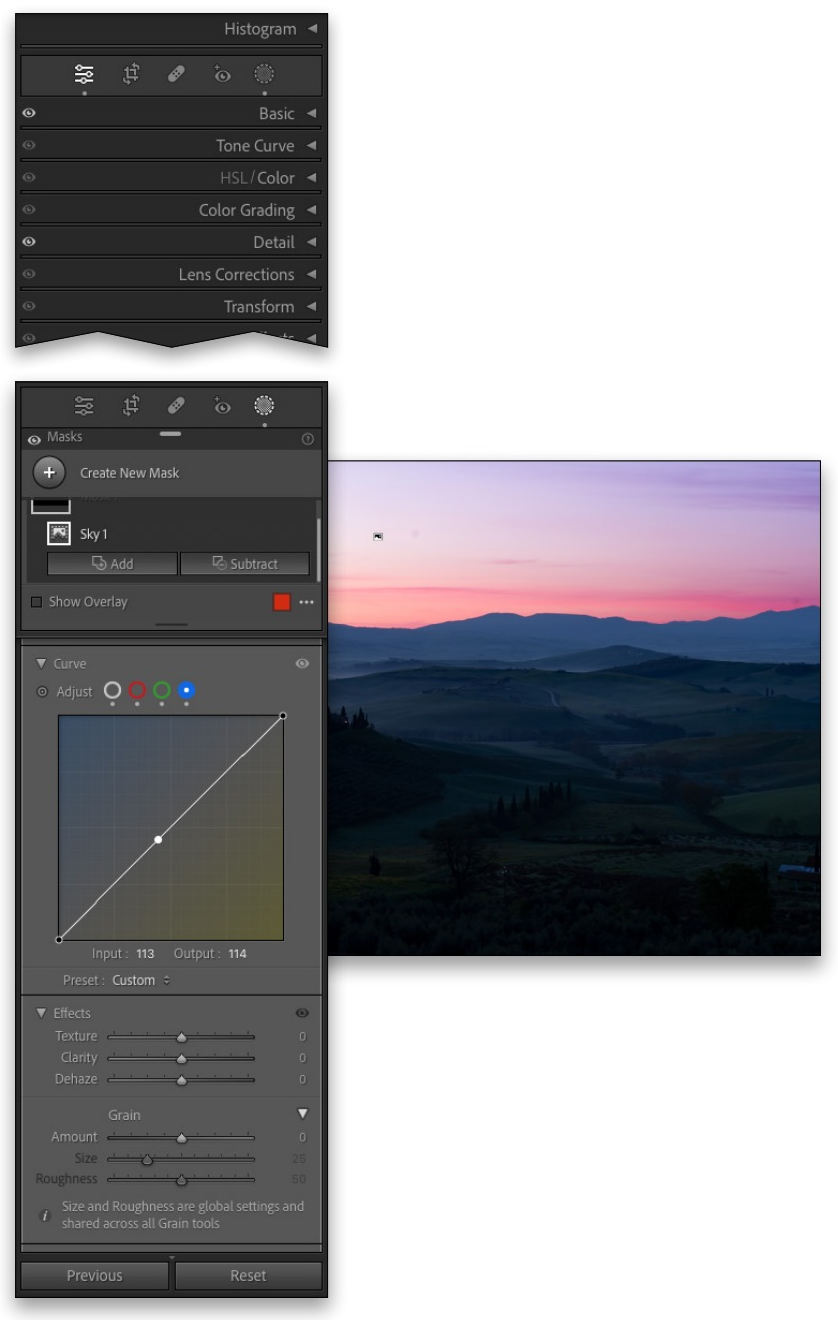
Another valuable addition is the ability to use curves in your masks. In this photo, click the Masking icon, then click on Sky to create a mask for the sky. Tailor your edits to the sky mask using the Curve. Start by clicking the white circle (Point Curve) next to Adjust. After clicking on the curve to add a point, set the Output to 88 and the Input to 43. Add another point at 186/174. Select the red dot (curve for the red channel) and set a point at 115/119. Add a point on the green curve at 126/112, and finally, a point on the blue curve at 113/114. This enhances the natural beauty of the sky.
Related: Lightroom vs Photoshop, Which One should You Choose?
There you have it! I hope this has inspired you to rejuvenate some old noisy photos with this new technique. Now, armed with these tools, you can have fun and create exceptional images with the latest features in Lightroom!

Comments