
You can use Lightroom’s powerful selective tools to create these creative color effects in your own photos. Lightroom is often associated with basic tonal adjustments, black-and-white conversions, sharpening, and essential photographic enhancements. While it does well in these fundamental tasks, it also offers the potential to artistically transform your images, as demonstrated in the vibrant portrait effect presented here.
This creative technique heavily relies on two influential Lightroom tools: the Graduated Filter and Adjustment Brush. Both tools empower you to define specific areas for adjustment, either through manual painting or by setting two points for a gradual blend.
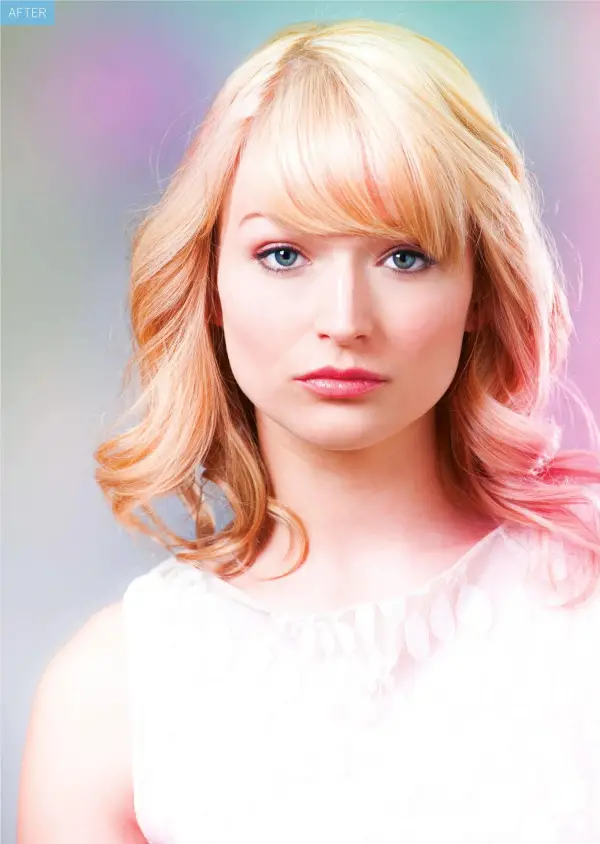
By manipulating the sliders in the upper-right corner of the interface, you can alter exposure, color, and detail to suit your preferences. While these tools are commonly used for selective lightening and darkening, they also open up possibilities for experimenting with color, saturation, and clarity settings, leading to captivating visual effects. The step-by-step guide on the following pages outlines the process of replicating the image on the right. However, the core principles remain applicable to any image you choose to work with. Don’t hesitate to explore and experiment with your own photos. Additionally, we introduce four more Lightroom treatments you can try independently.
1. Brighten the Background
Import the ‘dng’ file into Lightroom’s Develop module. Adjust Temperature to 4500, Tint to 0, Exposure to +0.36, Highlights to -14, Blacks to -21, and Vibrance to +26. In the HSL Panel, under Luminance, use the Target tool to increase the Blue and Aqua sliders by clicking and dragging upwards on the background. Access the Adjustment brush from the toolbar.

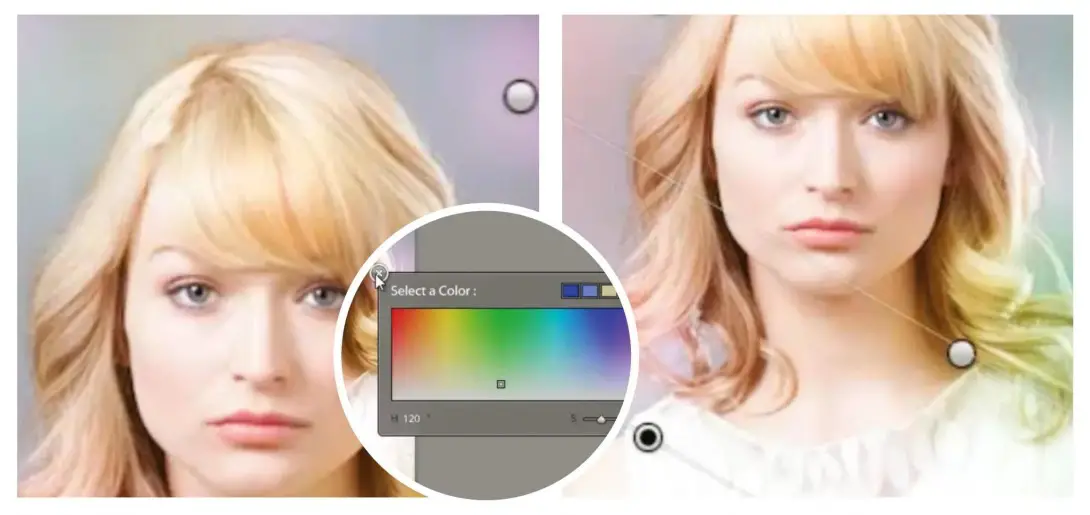
2. Paint the Colored Spots
Navigate to the Adjustment brush sliders on the right-hand side panel. Select a pastel pink color by clicking the Color box, then slightly increase the Exposure to about 0.69. Configure the brush settings with Size at 17 and Feather at 100. Add an Edit pin by clicking in the image, and proceed to incorporate subtle spots of color. Use the square bracket keys to resize the brush tip as needed.
3. Introduce Additional Colors
Click ‘New’ at the top, and choose a different pastel color from the Color box. Continue clicking around the image to introduce various color spots, progressively building up the effect. You may opt for a limited palette of pastels, such as red and purple or blue and green, rather than an array of neon pastels.
4. Apply Colored Gradients
Access the Graduated Filter in the toolbar. Set similar color and exposure settings as before, and then drag from the top-left corner to add a gradient effect that starts in the corner and gradually diminishes. Add more colored gradient effects in other areas of the image, adjusting colors as needed. It’s advisable to layer the effects gradually. Take Snapshots to easily compare different versions as you work.
These beautiful color effects really pops out that artistic look in your photos which looks cool and as well as gives a professional touch. Share your creative color artistic looking photos in the comments.

Comments