Studio lighting is a crucial aspect of portrait photography. It allows you to control the quality, direction, and intensity of light to create flattering and visually appealing portraits.
To add a studio light to a portrait, open the photo of a portrait with which you want to work. Select the area(s) in the portrait to which you want to add lighting. After you finish the selection, click on the Create New Adjustment Layer icon (half-filled circle) at the bottom of the Layers panel and choose Brightness/Contrast. Adjust the Brightness to your taste in the Properties panel (Window>Properties).
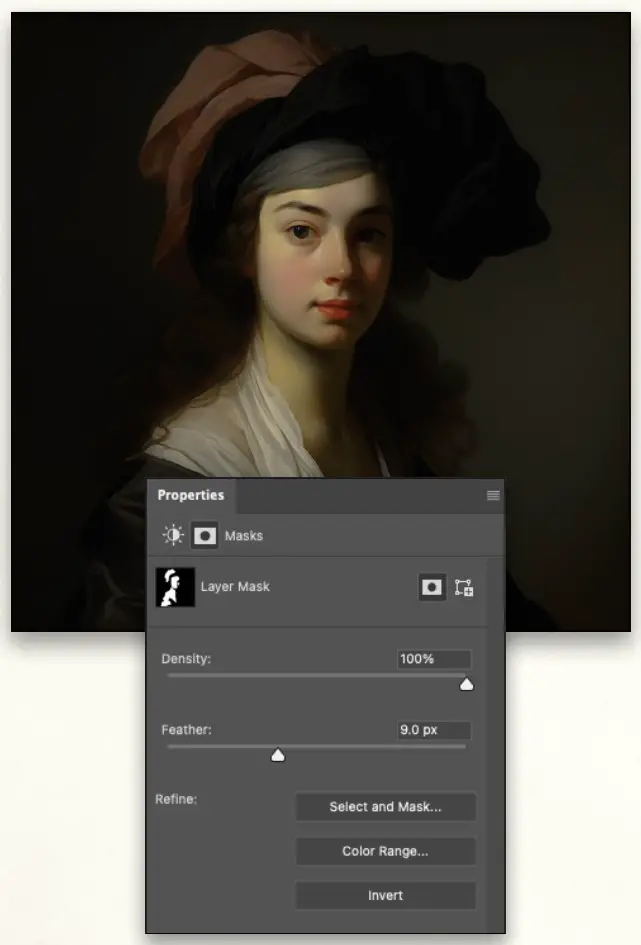
Click on the Masks icon (circle in a square) at the top of the Properties panel, and increase the Feather value for a smoother transition from the brighter to the darker areas.
SEE ALSO: Creating a Radial Background in Ligthroom is Easier than You Think
Remember that studio lighting is a creative tool, and there are no strict rules. Practice, experimentation, and understanding how to manipulate light will help you achieve the desired results and create compelling and visually striking portraits.

Comments