How to Setup and Start Internet Radio Station for Free

In this guide you will learn how to setup and start an Internet Radio Station using free tools available on the internet.

First thing is that you have to decide what you want to broadcast on the station. For most the answer is music. You may also include talking, teaching or sounds etc. Anything you ever want to broadcast overall it’s your station.

Quick Way:

If you want a quick way to stream your music playing on your PC to your buddies on the internet, you can simply take a male-to-male 3.5mm RCA audio cable and plug one end into the microphone jack and the other end into the headphone jack on your PC, and either start a Skype session or sign up for an account with a Web-based streaming service (Justin.tv or Ustream.tv, for example) to get started.

Your computer will feed your audio output (from the headphone jack) to the audio input (from the mic jack) and broadcast it to whoever is on your stream. All you have to do is open up your MP3 player of choice and you’re going.

Justin.tv also supports Youtube playlists, so your listeners can stay on after you sign off. It you want to set up something that gives your listeners a clearly radio experience, You have to do a little more to setup.

Step 1: Digitalize You Content

First of all you have to digitalize all of your audio content you want to stream. For this you need to rip all you audio CD’s on to your PC. You can use Windows Media Player ripper.

Step 2: Download and Install Free Softwares for Broadcasting

You don’t need any special or paid software for this-aside from a mic, which is used if you want to say anything on station broadcasting. You need an app for playing music files, one to turn audio stream into streamable source and one to act as a server for sharing your streaming with the world.

We will use Winamp to play music files on your PC, Edcast (Winamp plugin) to turn playing music into stream and Icecast for server.

You’ll also need to download a special .DLL file (lame_enc.dll) if you want to broadcast in an MP3 format: Download the zipped version, unzip it, and put lame_enc.dll in Winamp’s root directory (it usually is located in C:/Program Files/Winamp).

Step 3: Set Up Your Audio Streaming Server

Before you start streaming estimate the audience you want of expect. Your capacity to stream music depends on your Internet connection’s upstream speed which is a speed at which you can send data to other computers over internet. With fast upstream speed you can serve more listeners with better audio quality.

Both connection speed and digital audio quality are measured in kilobits per second (kbps)-not in kilobytes per second (KBps)-you can figure out how much bandwidth you need to serve your radio station by using these numbers into this formula:


Simultaneous listeners x Audio bitrate = Required bandwidth

If you are hosting the station on a home PC with a normal cable or DSL connection, your upstream speeds probably are not great. Normally DSL’s maximum upstream speed is about 500 kbps (about 50 KBps), and a high-quality MP3 feed requires at least 192 kbps, so it able to serve only two listeners.

We could lower the quality of the feed to, say, 96 kbps, but then the audio quality of my stream would be significantly worse.

Fortunately, the stream server doesn’t have to live on the same PC as the audio source. You can use your PC to play the music with Winamp and to source it with Edcast, and then send the stream over the Internet to a dedicated radio stream server equipped with a high-bandwidth connection.By using this method, your internet connection needs to strong enough to send out one stream to the dedicated server-but it doesn’t have to be any stronger. Also, you don’t have to monopolize your Internet connection to keep up your radio station, since you’re sending a single stream to the server, which then handles each listener with its own broadband connection.

Typically, you have to pay for a dedicated radio server, the rates start at about $6 per month and increase as your radio station’s traffic grows. But some free Shoutcast radio servers rely on ads to pay the bills. One such server, FreeStreamHosting.org, invites you to broadcast a 128-kbps stream to up to 1000 users at no charge–and the ads stay out of your audio stream (instead, they get displayed on the Web page you use to advertise your station).

I recommend signing up for a dedicated radio server: The cost is far less than what you’d pay for a home Internet connection and such servers are slightly easier to configure.

If you mind set for a dedicated streaming server, make sure that you know the host’s IP address or URL, the correct port number, the stream password, the server type (usually it’s either Shoutcast or Icecast), and the maximum bitrate (if applicable) before moving on.

If you want to run your own server, download and install Icecast, open the app, and select Edit Configuration from the Configuration menu. This will open a text document called ‘icecast.xml’, which you’ll have to tweak a bit. From top to bottom:

  • For the ‘sources’ tag, enter the maximum number of listeners you want your station to have.
  • For the ‘source-password’ tag, enter the password you want to use for your stream app (Edcast).
  • The ‘relay-password’ and ‘admin-password’ tags aren’t important for this how-to, but change them from the default anyway.
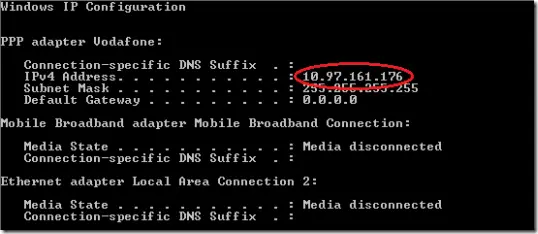
  • For the ‘hostname’ tag, enter your IP address. If you want to broadcast only to your network, use your internal network’s IP address. Otherwise, you can find your outside IP address at WhatsMyIP.net.
  • The ‘port’ tag refers to the port you’d like to use to stream the music. Left it on the default 8000. Remember, you’ll probably need to open this port in your firewall in order for your radio station to work.

Save the icecast.xml doc (in the root icecast directory, usually C:/Program Files/icecast), and click Start Server in Icecast’s main window

Step 4: Configure The Settings in Winamp to Begin Broadcasting

Now that your stream server is running and you need to give it something to stream. That’s where Edcast comes in. Grab the Edcast Winamp plugin, open Winamp, go to Options, Preferences, Plug-ins, DSP/Effect, select edcast DSP v3 [dsp_edcast.dll], and click Configure active plugin.

Here you can set Edcast to use either microphone jack or Winamp playlist. Just click the mic picture to enable or disable the mic; when the mic is disabled, Edcast will use Winamp for its input.

Next, click Add Encoder to add a new entry (Vorbis: Quality 0/Stereo/44100) in the box below, and double-click the new entry to configure it. Here you’ll need to plug in your server settings-make sure that the server type is set to the right protocol (Shoutcast or Icecast, depending on which server you chose in step 3), enter your server’s IP in the Server IP field (if you are hosting the Icecast server on the same PC, it’s your IP address), and enter the corresponding port and password.

You will also want to set your encoder type here: AAC and MP3 tend to be the most widely compatible, AAC+ is optimized for lower-bitrate audio applications (perfect for streaming), but it sometimes doesn’t sound as good, and Ogg Vorbis has fairly high audio quality at lower bitrates, but certain music player apps (iTunes, for example) don’t support it.

If you’re using Icecast, note the ‘mountpoint’ entry in the Basic Settings tab. You wll need to put a path here depending on your encoder type: Ogg Vorbis streams can be called “/whatever.ogg”, AAC streams, “/whatever.aac”, and so on. This string will eventually appear at the end of your radio station’s URL, as in “http://xxx.xxx.xxx.xxx:8000/whatever.aac”.

Linking your radio station URL to your IP address can be a pain–particularly if you don’t have a fixed IP address for your home broadband–because your listeners will have to keep up with your IP changes. To avoid this complication, you can register your own domain name; but if you don’t want to shell out the cash, you can sign up for a free DynDNS.com domain name instead.


Step 5: Play What You want to The World

Icecast (or your dedicated radio server) is up, Edcast is configured, and your Winamp collection is ready. So click Connect in the Edcast window to connect Edcast to your radio server, and start playing.

Comments

Comments

Leave a Reply