Creating a system image is a smart strategy for ensuring the instant recovery of your entire system in the event of a major issue. While regular file backups are crucial, a system image snapshot captures your entire setup, making it easy to restore Windows, your software, and data without the hassle of a full reinstallation.
System Imaging
System image operates much like VirtualBox snapshots, effectively capturing a comprehensive snapshot of your entire system. This image can be easily restored, saving you the need to reinstall Windows along with all your software and data.
Let’s dive into the steps required to create a Windows system image:
SEE ALSO: Where to get your BitLocker recovery key for Windows
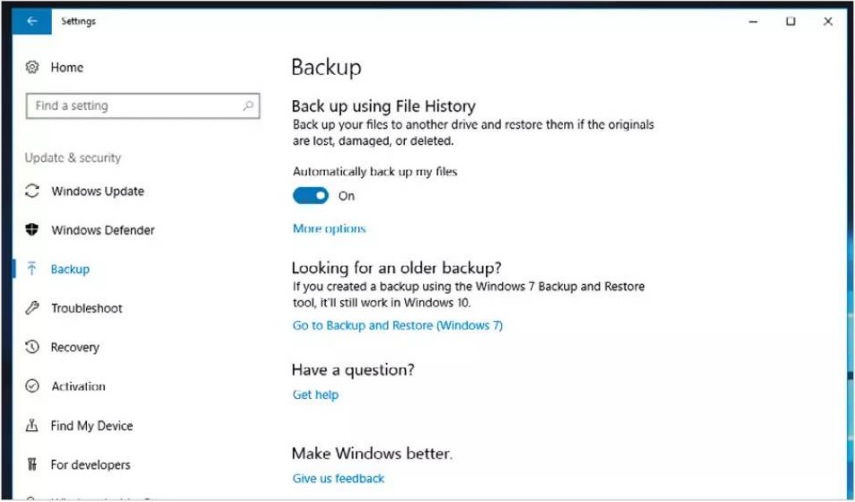
Step 1
Initiate the process by clicking on the Windows Start button and navigating to Settings > Update & Security > Backup. Click on Go to Backup and Restore.
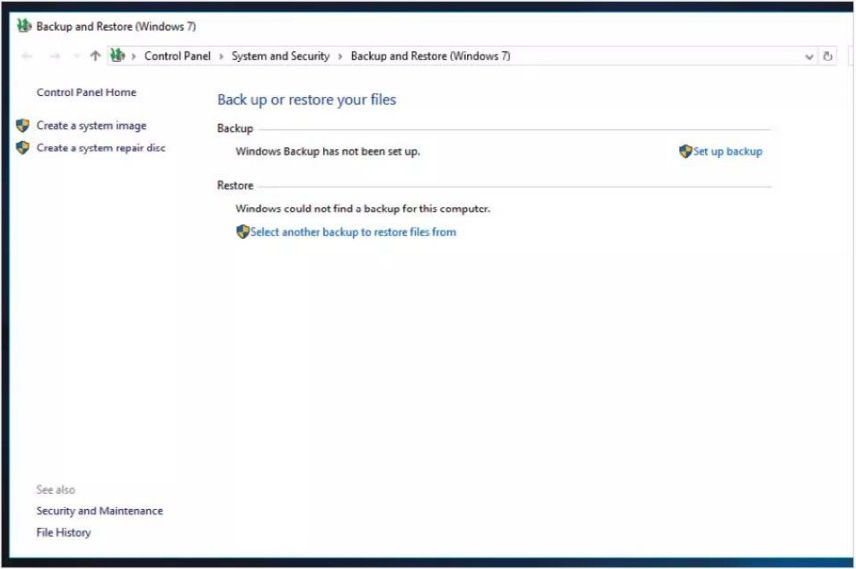
Step 2
This opens the Backup and Restore console, a feature retained in newer Windows versions for compatibility with older backups. Click on Create a system image.
Step 3
Windows scans for a suitable drive to store the system image files. If necessary, make any drive format changes as prompted.
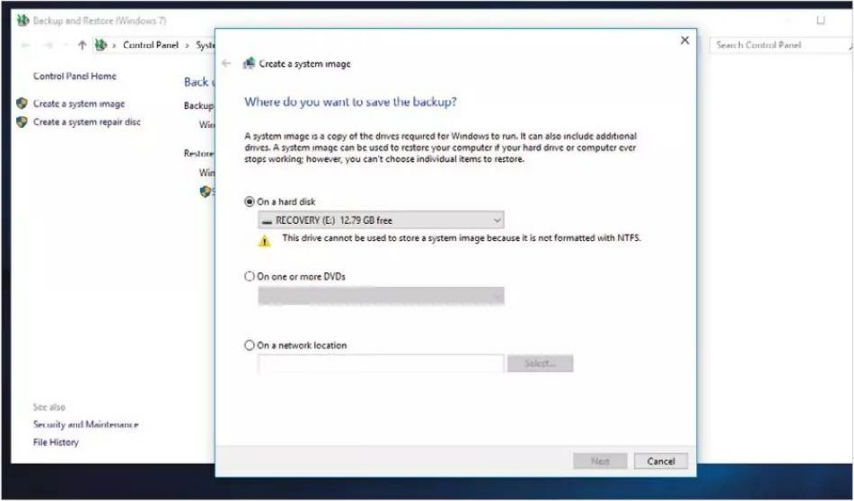
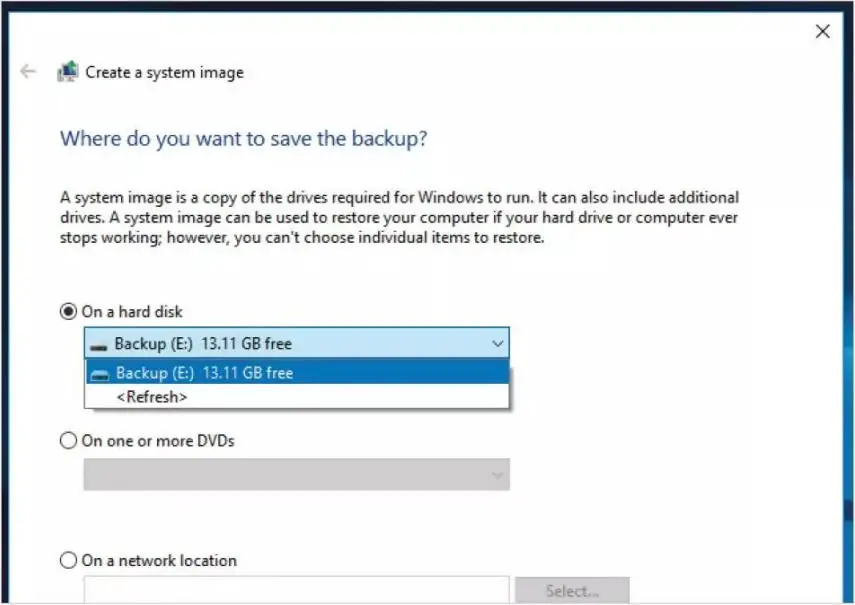
Step 4
Assuming the requirements are met, you’ll be prompted to choose a destination for the system image. You can select an internal drive, DVDs (based on image size), or even a network location.
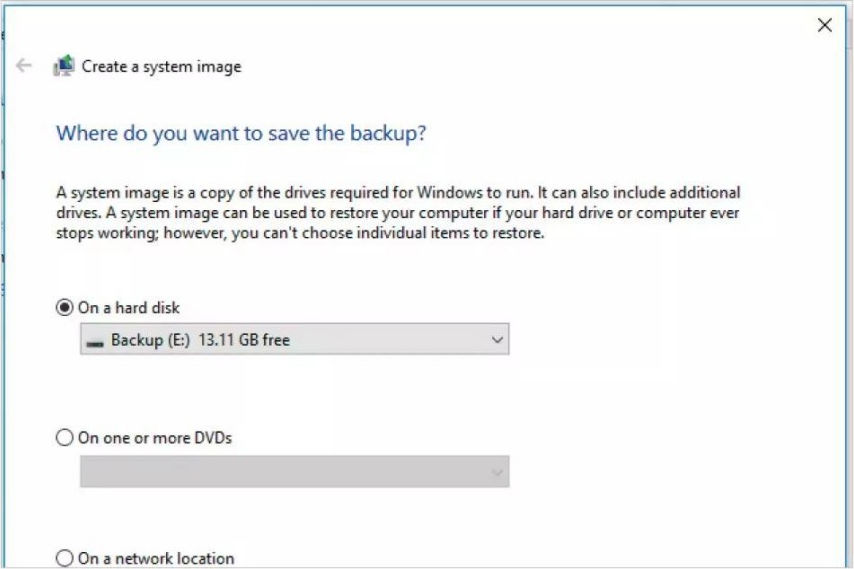
Step 5
For this example, let’s use an internal second hard drive. Ensure the correct drive is selected and click Next.
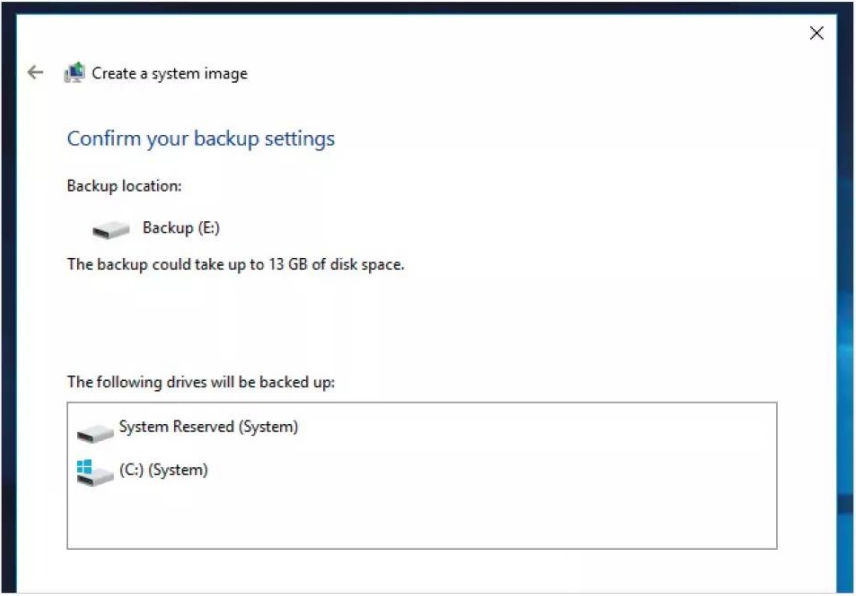
Step 6
The next window displays the drives included in the system imaging process. Typically, this includes the C:\ drive, the system drive, and the System Reserved partition. Both partitions are necessary for a successful system restoration.
Step 7
When ready, click Start Backup to initiate the imaging process, which may take some time depending on the storage space used and the write speed of the selected drive.

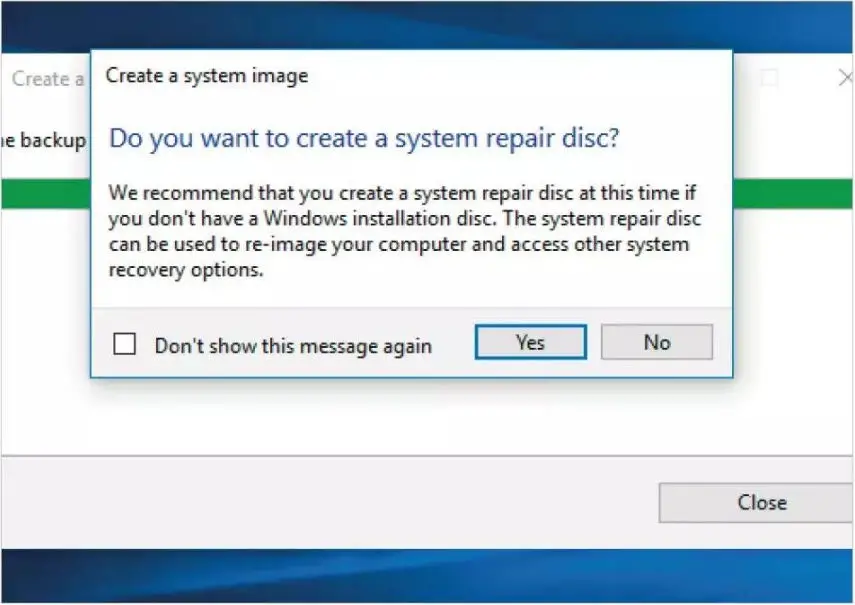
Step 8
After completion, Windows will prompt you to create a System Repair Disc, which allows you to boot into the environment for system image recovery.
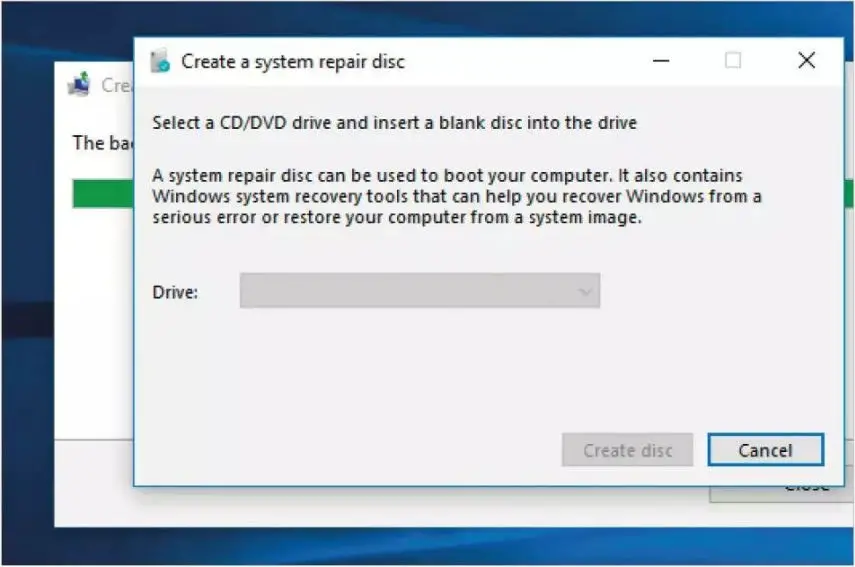
Step 9
If you choose to create the System Repair Disc, ensure you have a blank DVD available, follow on-screen instructions, and burn the repair files to the disc.
Step 10
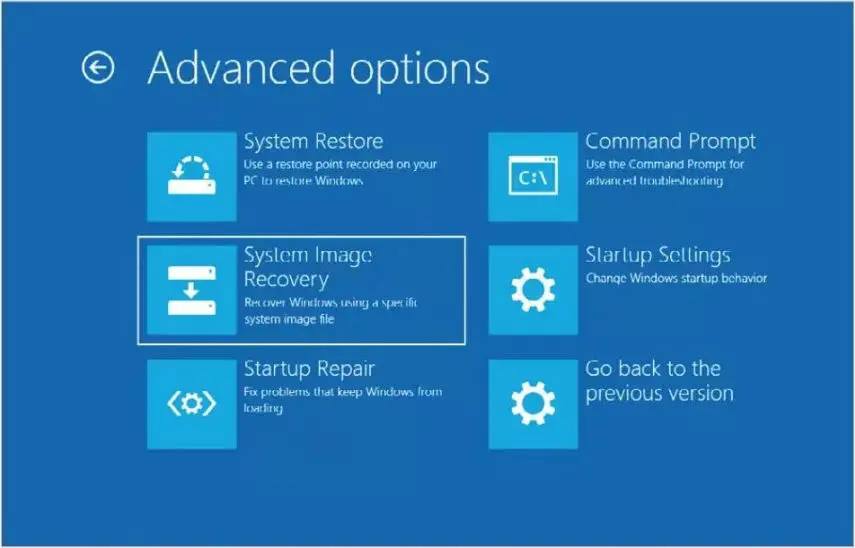
When the need arises to restore Windows from the system image, boot from the System Repair Disc, select the System Image Recovery option within the Advanced Options of the Troubleshoot menu, and follow the instructions. Within minutes, your Windows will be back to its state when the system image was created.
By following these steps, you can safeguard your system with a comprehensive backup that offers an easy and efficient recovery solution for your Windows setup.

Comments