The following steps will guide you through installing Windows 11 on any Mac with an Intel processor, but please note that this method does not work with M1 Macs.
To successfully complete this installation, you’ll need three essential files: the Windows 11 ISO, the current Windows 10 ISO, and an ISO creator of your choice.
Windows 11 comes with specific system requirements, including the Trusted Platform Module (TPM 2.0) security and secure boot. While Macs have secure boot, TPM 2.0 is not commonly found on them.
First, download the required ISO files for installation. You can obtain the Windows 10 ISO from https://www.microsoft.com/en-us/software-download/windows10 and the Windows 11 ISO from https://www.microsoft.com/en-us/software-download/windows11.
For an ISO creator, visit https://crystalidea.com/anytoiso/download to download the software.
SEE ALSO: How to Backup Windows
Now, let’s proceed with the installation:
- Right-click on the Windows 10 ISO file and select “Open With“, then choose “DiskImageMounter”.
- A folder will appear on the desktop. Select all the items within it.
- Right-click on the selected items and choose “Copy (no of items)“.
- Create a new folder on the desktop and paste the copied items into it. You can rename this folder Soft for reference.
- Right-click on the Windows 11 ISO file, open it with “DiskImageMounter.”
- Inside the Windows 11 ISO folder, locate the “sources” folder.
- Right-click on the “install.wim” file, choose “Copy,” and paste it on the desktop temporarily.
- Before proceeding, unmount the previously mounted files by right-clicking on them and selecting Eject “name of the file.”
- Right-click on the “install.wim” file, and choose “Get Info“.
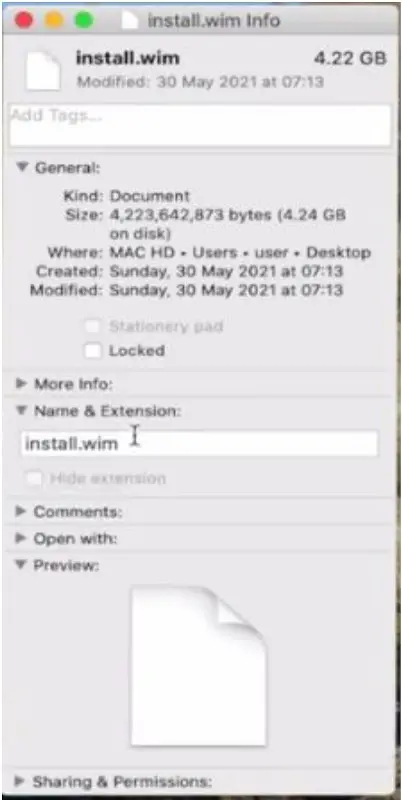
- Click the downward arrow next to “Name & Extension” and rename the file from “install.wim” to “install.esd“.
- Navigate to the “Soft” folder created earlier and open the “sources” folder within it.
- Locate the “install.esd” file, right-click on it, and move it to the trash.
- Now, move the “install.esd” file from Windows 11 into the “Soft” folder.
- Open the ISO creator software (e.g., AnyToISO).
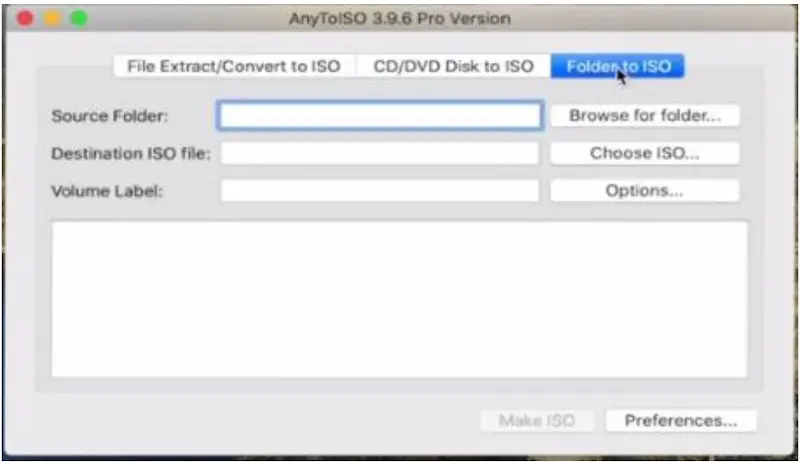
- Select the “Folder to ISO” option.
- Choose “Browse for folder” and select the “Soft” folder on your desktop. Click “Open” at the bottom right of the screen.
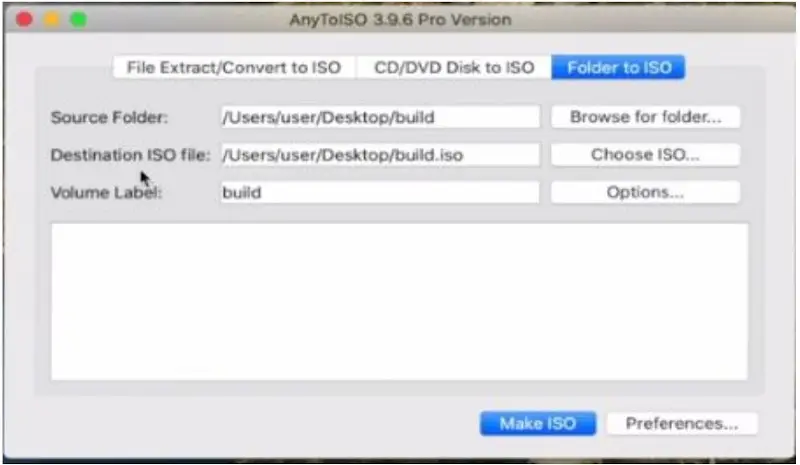
- Click “Make ISO” at the bottom of the display. This will create a file named “Soft.iso” on your desktop, which contains the Windows 11 installation files.
- Go to the “Utilities” folder and open “Boot Camp Assistant“.
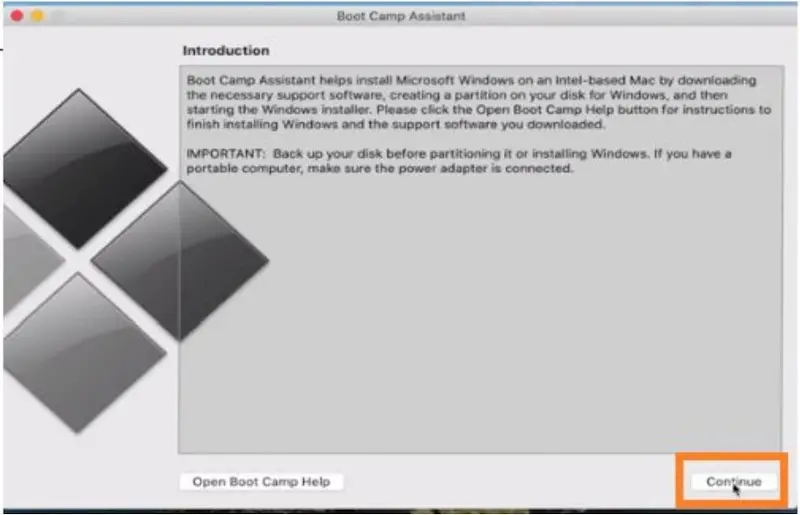
- Click “Continue” at the bottom right of the screen.
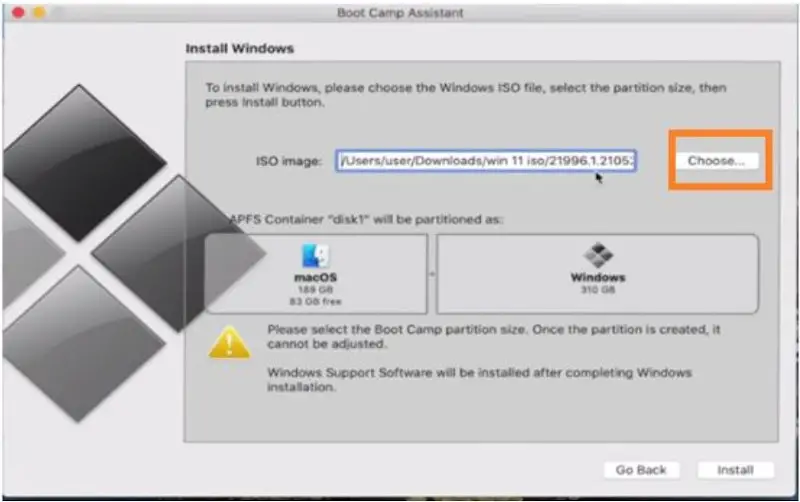
- Select “Choose“, go to your desktop or the location of the “Soft.iso” file, and choose the “Soft.iso” file.
- Click “Open” and then toggle “Install” at the bottom right corner of the screen.
- Boot Camp Assistant will handle the installation and download all the necessary Windows 11 support software.
- This process may take some time depending on your internet connection. Ensure your Mac is adequately charged or connected to a power supply.
- After the installation of Windows 11 support software, your PC will restart.
- Once your PC boots up, you’ll see the Windows initial setup screen.
- Click “Next” at the bottom right of the screen to proceed and configure your preferred installation language, time, currency format, and keyboard or input method. For this guide, we’ll choose “United States“.
- Select the Windows 11 edition you want to install (Home or Pro) and click “Next“.
- Accept the license terms by ticking the box and clicking “Next“.
- The installation process will start and usually takes less than 10 minutes based on your Mac’s speed. You’ll be prompted to restart your system; click “Restart now” at the bottom right of the screen.
That’s it! After the system boots up, your Mac will be running Windows 11.

Comments