Windows 11 is bundled with tons of gaming optimization features including Auto-HDR and DirectStorage. Firstly, ensure your Windows 11 is up to date. Also, ensure all the relevant chips, NVIDIA and GPU drivers are installed, though Windows 11 automatically detect GPU and install drivers accordingly. Windows only installs the most stable drivers at the time of release and not the latest.
Go to the Start Menu and type mouse on the search field. Select the best match and it will be Mouse pointer style. Then select Mouse under the heading Related Settings. Go to Additional mouse settings under the Related Settings and click the tab Pointer Options at the top of the Mouse Properties small window.
SEE ALSO:
- How to Run Android Apps on Windows 11
- How to Use Speech Recognition to Interact with Apps in Windows 11
- How to keep Windows 11 after cloning the drive
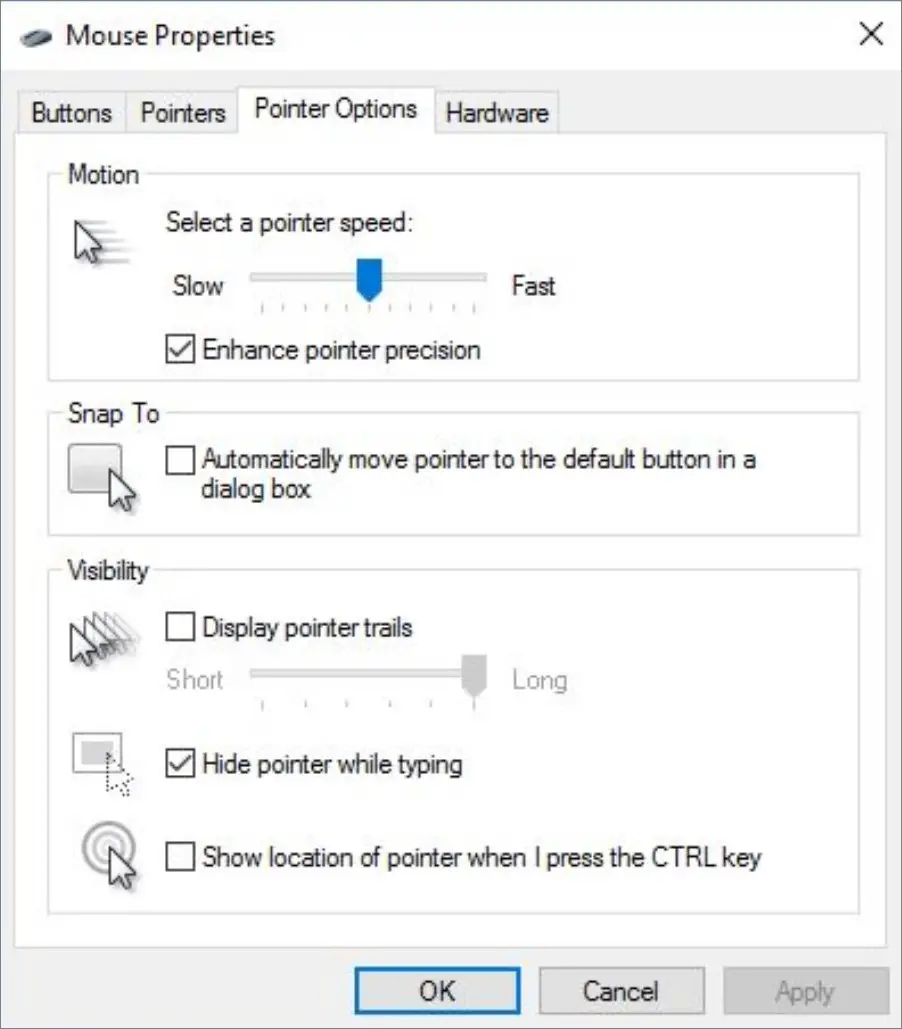
Uncheck the option Enhance pointer precision and as it makes the acceleration of the cursor to be high. And click OK at the bottom of the screen to confirm. Right click on the Start icon and select task manager or press CTRL + ALT + DELETE and tap task manager.
On the task manager interface select the tab Startup. And make you disable all the applications to prevent them from running when you power on your PC but you can enable the ones you will need when the device is booting up.
Now go to Settings and then click on the option Gaming. Navigate to the option Game Mode and turn On the switch to the right of the option. Go ahead to the new option Graphics under the heading Related settings. Then you will see the list of apps installed on your system. Click on the ones that concern gaming and then select Option.
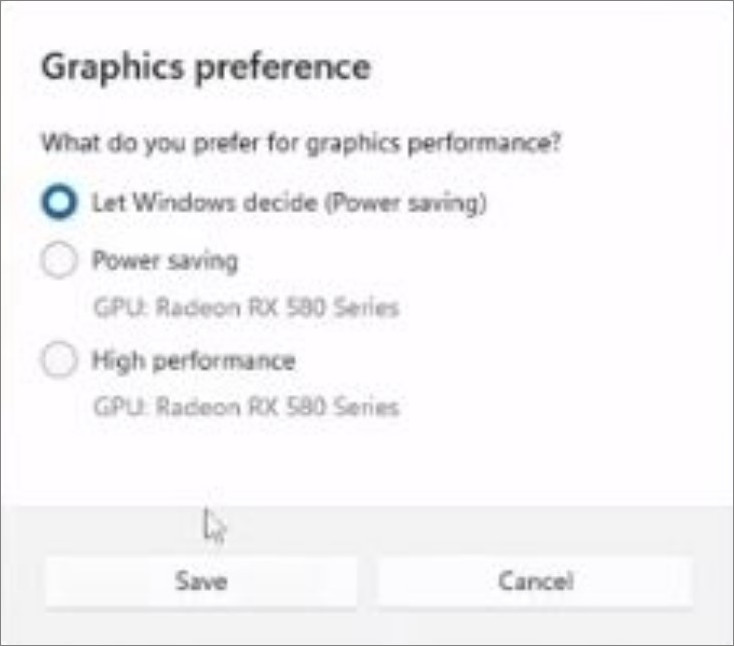
From here, you can set your device Graphics preference to any of the options above. For gaming, set your preference to High performance. Tap Save to confirm.
Make sure to turn off the Xbox Game bar when not in use.
Right click on the desktop and select NVIDIA Control Panel. Then select Manage 3D Settings and scroll down to OpenGL rendering GPU. Switch it from Auto select to NVIDIA GPU or the one on your device. Beneath this option we have Power management mode and set it to Prefer maximum performance. Click on Apply at the bottom right of the screen to confirm all the changes you made.
The next line of action is to type power plan on the search box and select the best match Edit power plan. At the top of the screen tap Power Options and tick the option High performance.
Now search for background apps on the search box and click on the best match Background apps.
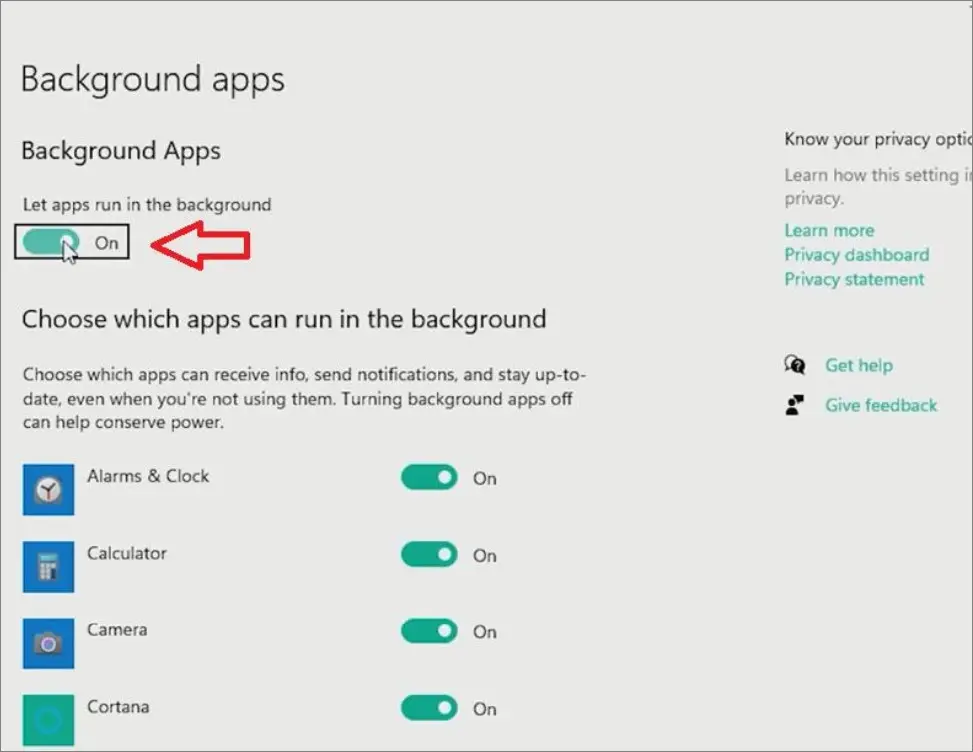
Toggle off the switch beneath Let apps run in the background to stop the listed apps from running on your device background.
Once again search for capture on the search box and toggle on the best match Capture settings.
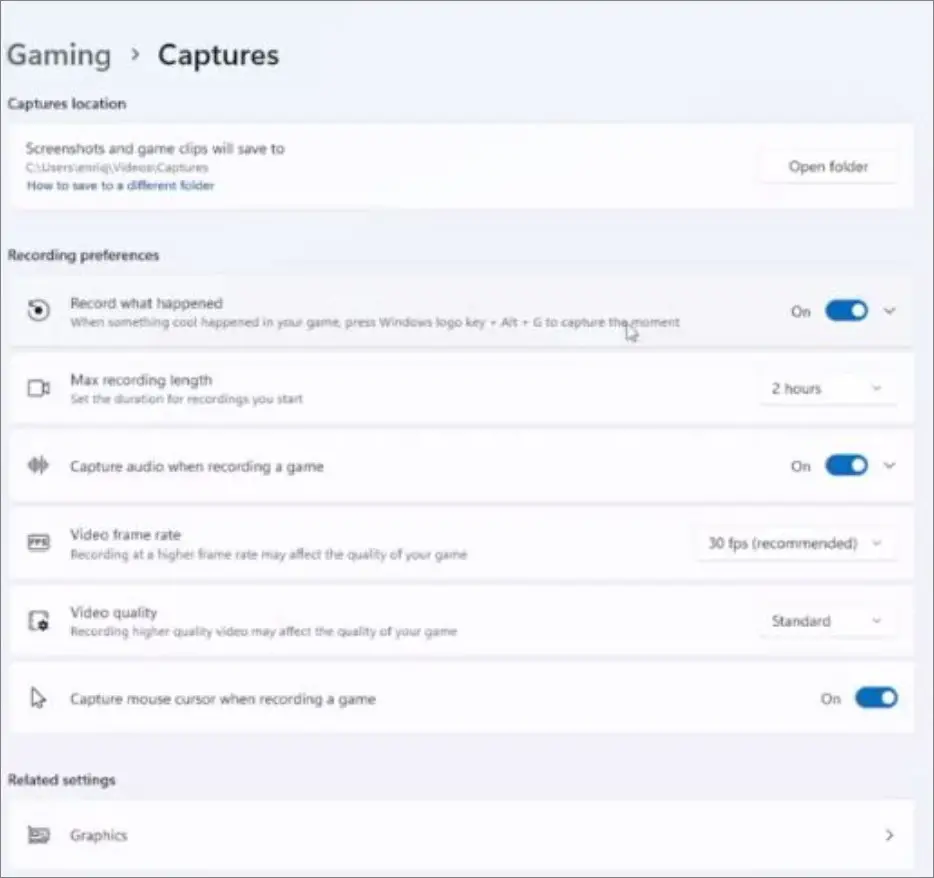
Turn off all the options under the heading Recording preferences, which includes Record what happened, Capture audio when recording a game and Capture mouse cursor when recording a game.
Now go to the Privacy & Security tab in the Settings app window. Navigate to the tab General under the heading Windows permission and turn off all the enabled options there. Then scroll down to Location under Apps permission and disable the services for all apps.
Return to the main Settings windows and click on the tab System. Select the option Notifications and turn off the feature for all apps. Within the Focus assist interface disable the option During this time under the heading Automatic rules.
Click on Multitasking on the tab System window and toggle off the Snap windows functionality. We’re turning this feature off because anytime you snap the windows into place while playing a game, it interrupts the performance of the game.
This time go over to the tab Remote Desktop under System and turn off the feature when not in use.
Head back to the main Settings display and select the tab Personalization and make sure you set the background to a picture or solid color not to slideshow. The slideshow takes up some PC resources which could be allocated to gaming.
Under Personalization select the option Colors and toggle off the feature Transparency effects. Our goal is not to make windows beautiful but to optimize performance.
Go to Apps on the Settings app menu and click the option Offline maps. If you have maps that you don’t put to use, do well to delete them. Go back to the Apps window and select the option Apps for websites and turn off all the apps on the window. Now select Video playback on the Apps interface and make sure Battery options is set to optimize for video quality.
Let’s adjust the performance and appearance of windows. Type performance on the search box and select the suggestion Adjust the appearance and performance of Windows.
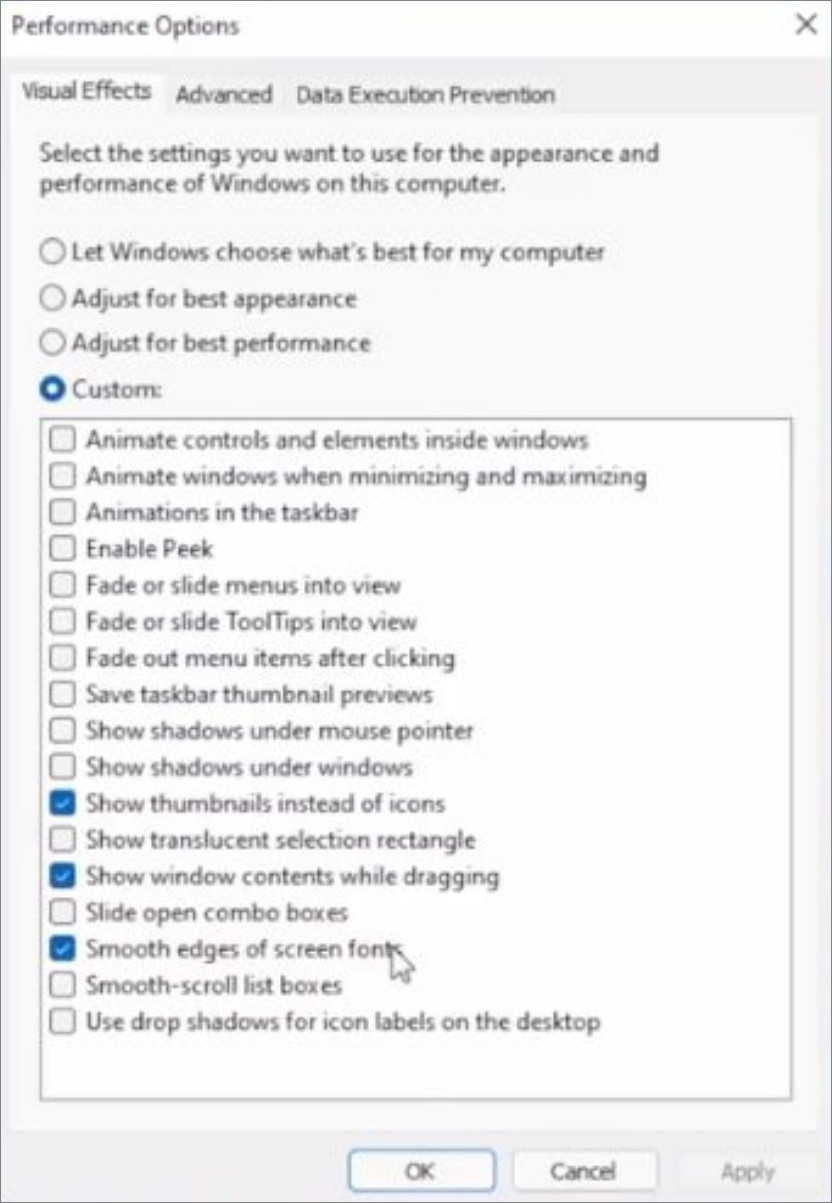
Uncheck all the options except the ones checked on the display above.
Click the tab Advanced and set the option Adjust for best performance of to Programs.
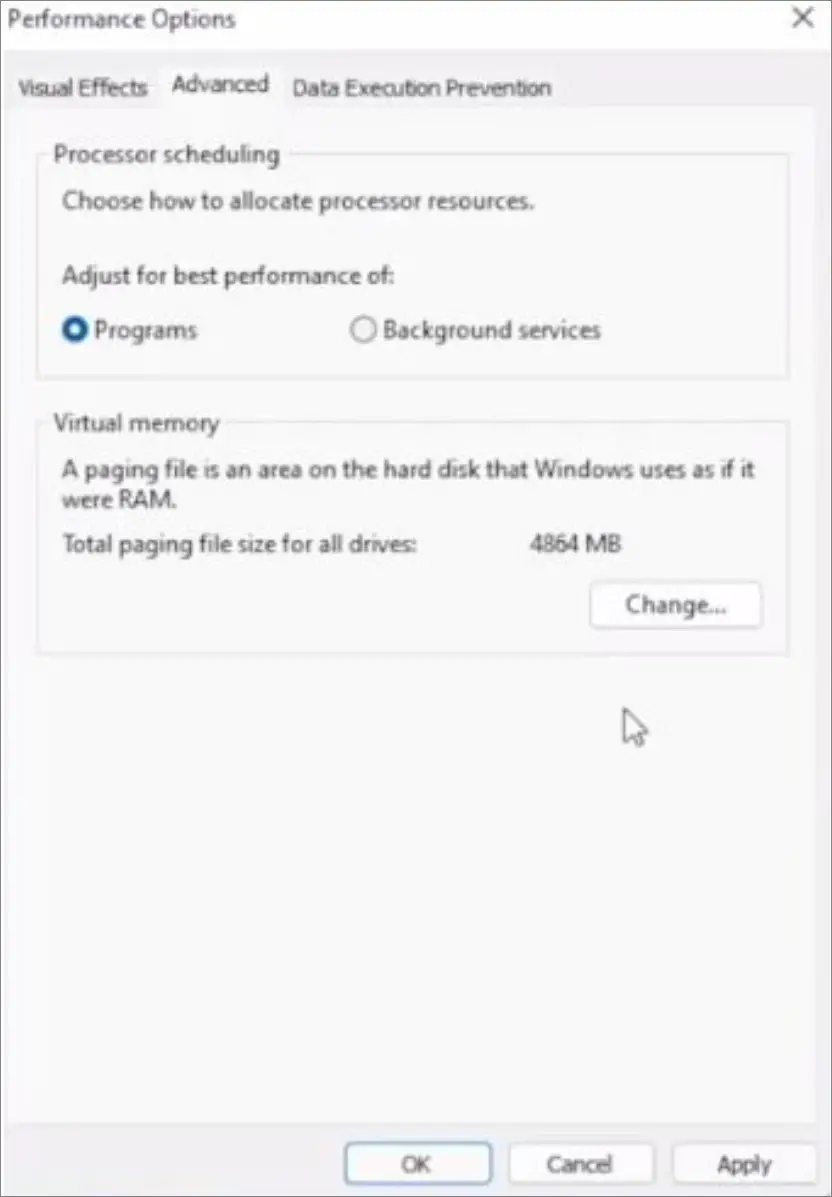
Now go into the Virtual memory tab via the link Change…
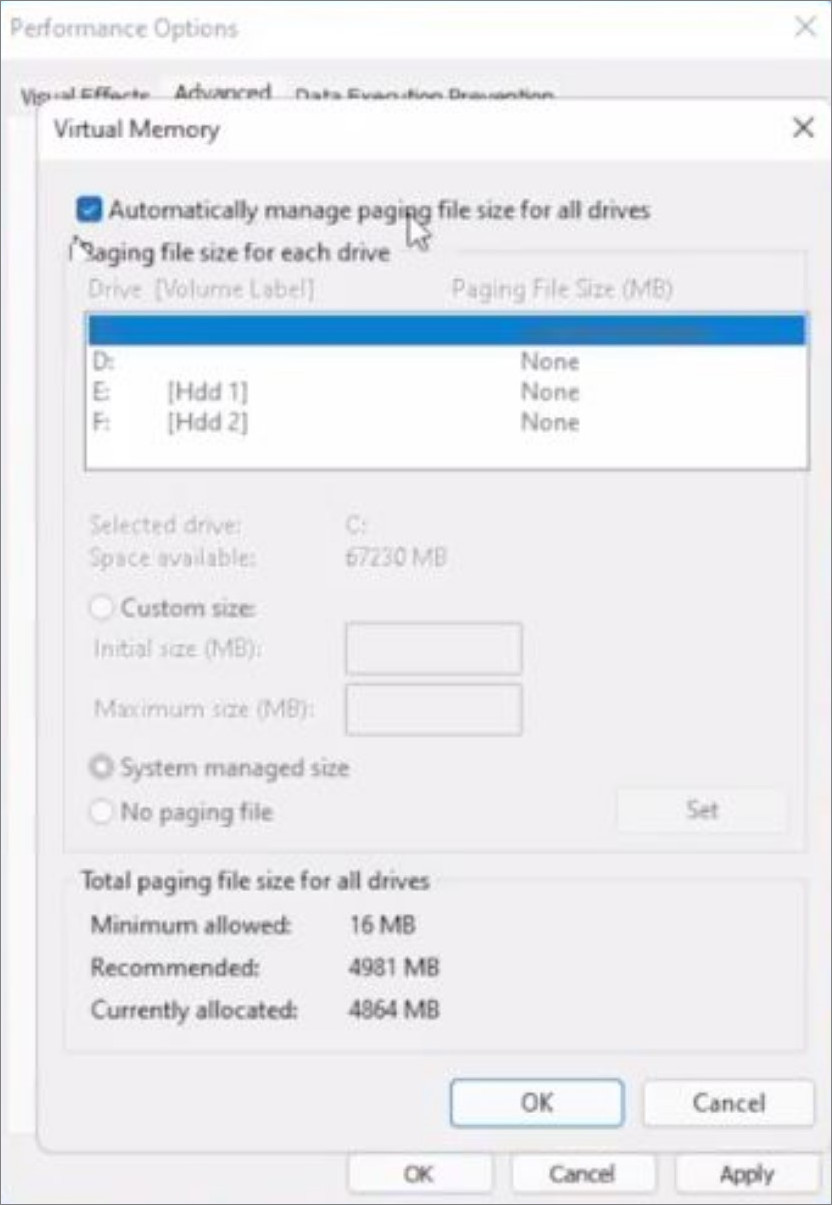
Uncheck the option Automatically manage paging file size for all drives and select the System managed size. Click Ok at the bottom of the screen and Apply to confirm all the changes. And finally click Ok to close the window.
By fine-tuning your Windows 11 settings and making strategic hardware choices, you can unlock the full potential of your gaming experience. Optimizing your system for gaming not only enhances graphics and frame rates but also minimizes distractions. Now that you have a comprehensive guide on optimizing your Windows 11 for gaming, you’re ready to embark on a smoother and more immersive gaming journey. Remember that the best settings may vary from game to game, so don’t hesitate to experiment and find the perfect setup for your favorite titles. Game on and enjoy the world of gaming like never before!
Related:

Comments